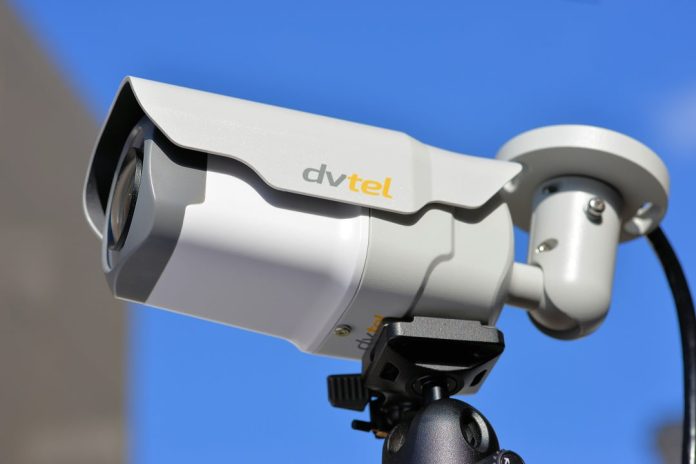
Quasar CB-6204 from DVTEL’s 1440P Quad HD Bullet series, distributed locally by QSS, uses new innovations, including DVTEL’s Quad HD resolution and multi-shutter WDR to push the boundaries of resolution and backlight performance.
DVTEL’S CB-6204 Series Quasar 1440P Quad IR HD bullet camera is another sweet release from the NJ-based company. The last DVTEL camera we tested was the 4K bullet and we loved it, especially during the day, when we thought it offered the best resolution of any camera we’d seen in street applications.
This CB-6204 is a different animal, even though it’s buttoned up in what looks to be a similar alloy and poly housing with 6 integrated IRs. This camera’s forte is backlight but there’s more to it than that – resolution is hopped up, too. The CB-6204 offers 2560 x 1440 pixels – that’s the reason DVTEL ascribes it using the nomenclature Quad HD and 1440P. Does this increase in resolution actually make a difference in the real world? Yeah, it sure does.
Features and functions
Before we push on, let’s take a look at the specifications and the functions of CB-6204. For a start, the camera has a 1/3-inch backside illuminated, progressive scan Omnivision sensor offering 2560 x 1440 pixels. Low light performance of the sensor is quoted at .3 lux in colour and .04 lux in monochrome, both unassisted, and 0 lux with the integrated IR illuminator on (measured with DSS ON at 30IRE). I don’t get near these low light figures with IR off in this test.
The use of a BSI sensor is important. Its design means circuitry is located on the rear of the sensor, instead of the front. It sounds obvious but in the past, sensor fronts have included photosites, a microlens and connections, reducing efficiency. With BSI designs, sensor manufacturers offer more photosites and/or larger photosites without shifting from a 1/3-inch sensor format. In the case of DVTEL, the sensor resolution has spiked and there are probably other advantages, including a reduction in the intrinsic noise level, meaning less need for amplification and a concurrent reduction in the need for digital smoothing.
As you’d expect, there are 2 lens options – the CB-6204-11-I has an f1.4 3-8mm varifocal lens giving a 96-38 degree angle of view. Meanwhile, the CB-6204-21-I has an f1.4 7-22mm varifocal with an angle of view ranging from 42-14 degrees. Both these lenses are motorized with auto-focus, auto-iris/P-iris, mechanical cut filter, automatic electronic shutter ranging from 1.0 to 1/10,000 of second. There’s also a digital slow shutter offering 1/1 to 1/25 or 1/30th of a second exposures and delivering what DVTEL says is a 32x sensitivity boost in colour or night mode. Obviously, very slow shutter speeds may increase motion blur and blooming around strong light sources.
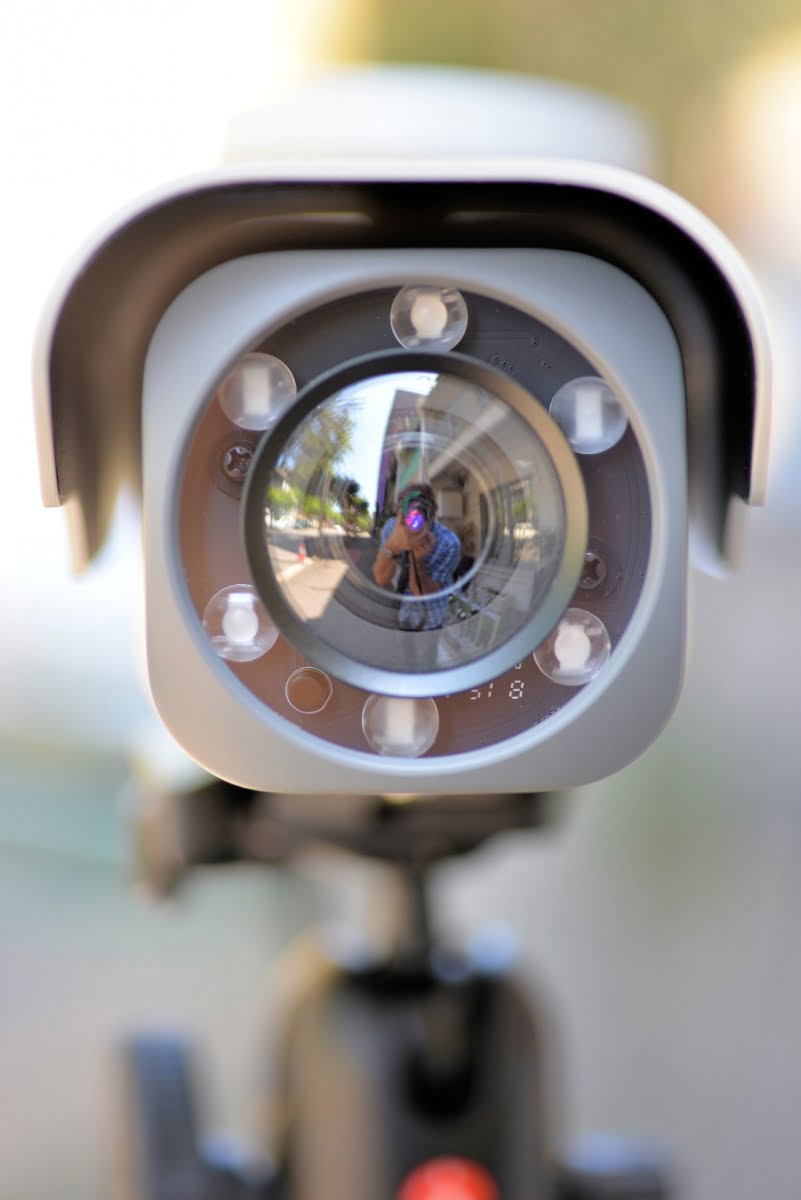
A key characteristic of the camera is the nature of its multi-shutter wide dynamic range function. There’s 2-shutter WDR offering 93dB and 3-shutter WDR offering 107dB – this latter can be turned on or off. Because DVTEL highlights WDR performance of this camera so enthusiastically, I wind up wrestling with these numbers. Humans, being simple creatures, want a single number that shows performance and when we don’t get that single number, comprehending performance becomes a vertiginous business.
This attitude in relation to WDR is probably a mistake. My doubts about the empirical nature of WDR numbers first started to emerge when I got hold of Sony’s SNC VB-630 and found it was the best 1080p camera we’d tested against 80,000 lux of backlight despite a quoted WDR number of just 90dB. The performance of DVTEL’s CB-6204 against backlight is also strong, despite modest-sounding WDR numbers and this may be down to that 2-shutter and 3-shutter WDR feature.
DVTEL explains to me that based on an advanced dual histogram analysis, the multi-shutter WDR system takes a long exposure to brighten darks areas and a short exposure to darken bright areas and the DSP intelligently combines the best of both (or 3 exposures) into a single composite frame of video which has significantly enhanced dynamic range. White balance options include auto, indoor, outdoor, ATW and manual, there’s automatic gain control, backlight compensation, 2D, 3D and colour noise reduction, tamper detection, 5 privacy zones, video motion detection with scheduling, Day/Night mode options including smart, auto, on and off, and signal to noise ratio is 50dB.
Video compression options include fully compliant multi-stream H.264, including main, high, SVC, baseline profile + MJPEG (FHD). Maximum performance in H.264 is 30/25 FPS @ 1440p + D1 (NTSC/PAL) or H.264 15/12 FPS @ 1440p + 720p + D1 (NTSC/PAL), and resolution is scalable from CIF to QHD 1440p. Bandwidth, meanwhile, can be set from 64Kbps and 20Mbps – there’s CBR/VBR rate control to tweak this. Integrated microSDXC card recording is up to 128GB (Class 10), there’s bi-directional audio with full duplex, line in and line out, G.711 and G.726, integrated audio connections in terminal blocks. There’s also a dry alarm contact and a relay contact, the latter drawing 300V AC/DC at 130 mA maximum.
Physically, this IP66, IK10-rated, DVTEL bullet camera has good feel in the hand, weighs just under 1kg and runs with the merest warmth felt at the rear of the alloy camera body. Length is about 220 x 10cm – it’s a compact unit with organically rounded edges and design cues. Meanwhile, the integrated mounting shoulder joint allows 360-degrees of pan, 90-degrees of tilt and 360-degrees of rotation during commissioning. The CB-6204’s SMD 6-LED IR illuminator has a range of 40m and a beam angle of 60m concentrated around the 850nm spectrum.
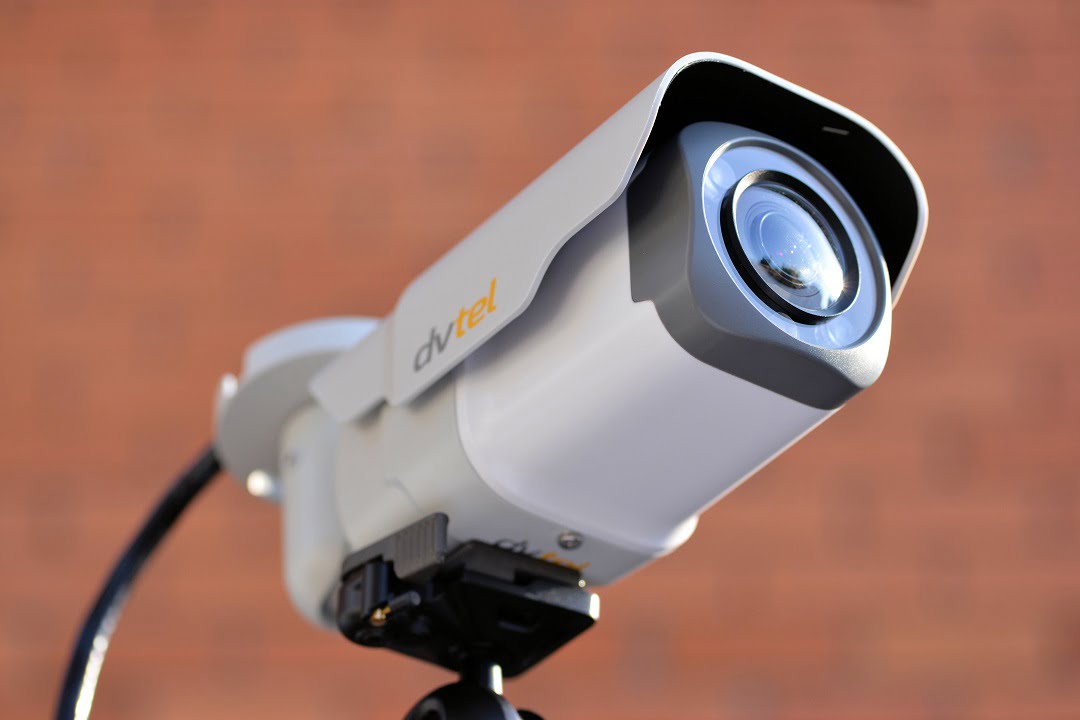
Operating temperature range is quoted at -40 to 50C but it’s important to point out that the cameras are equipped with integrated sunshields and the temperature ratings factor in the thermal gain effects of full exposure to the sun at 50C ambient and are conservatively stated for global deployments. At all times my sample runs as cool as a cucumber, even when left outside for 5 hours in 28C and full sun.
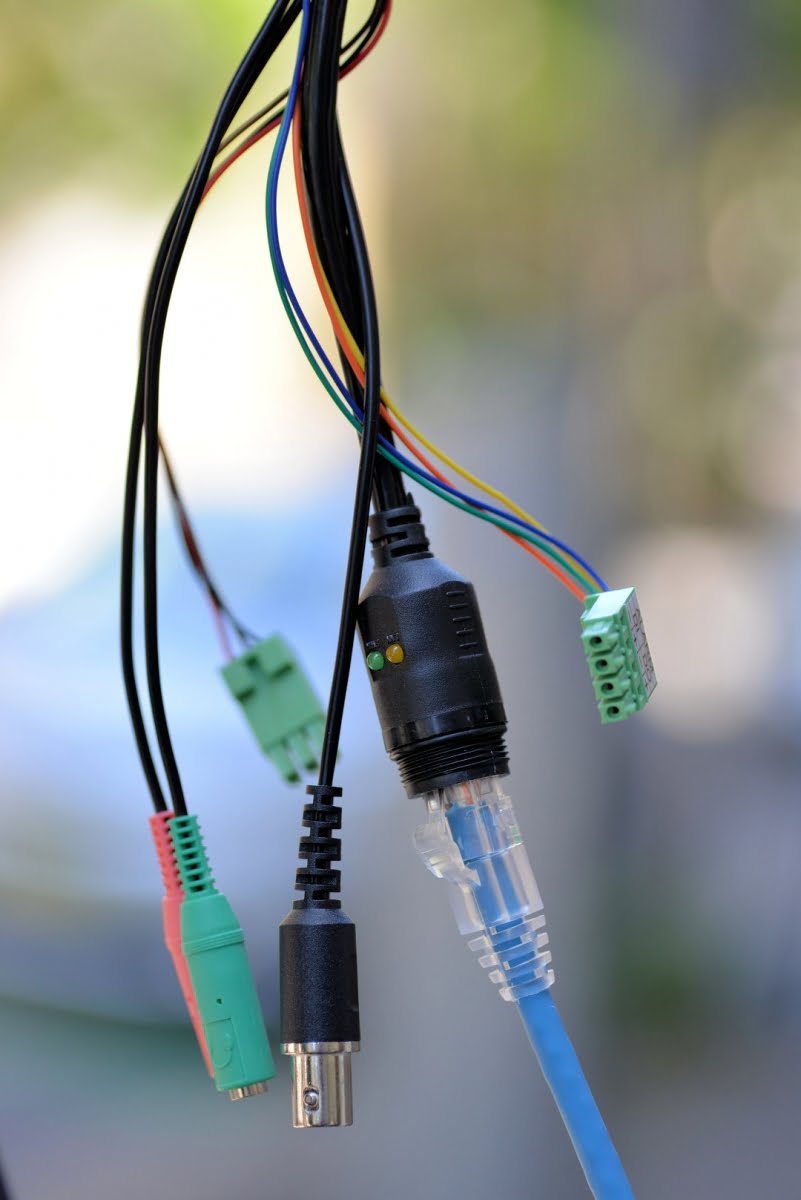
Power is 802.3af PoE (Class 0) and power consumption is modest 6W when installed internally, or 13W when installed externally with both the integrated IR and integrated heater running. While there’s PoE, you can use the AC/DC terminal block – all these power terminals and duplex audio are already incorporated into the flying leads emerging from the foot of the mounting plate. It’s all very well done from DVTEL.
Testing the DVTEL CB-6204
With all that out of the way, it’s time to test the camera. To run the show, I’m using SEN’s dedicated Dell 9020, with i7-4770 quad-core (8 threads per core), a clock speed of 3.4GHz, 8GB of RAM and an AMD Radeon R7 250 graphics card (2GB of RAM). We’re using a Netgear GS108P ProSafe 8-port Gigabit switch with 4-port PoE for power and comms, and nothing else connected to give us a purer sense of potential latency. I’m driving the camera through its integrated DVTEL browser, which is one of my favourites.
My first impressions inside the office at a focal length of 3mm and default settings are of unexpectedly mild barrel distortion, very strong colour rendition, excellent resolution delivering great depth of field and excellent textured detail, little or no sign of chromatic aberration, latency of around 400ths of a second and blooming around hot points of light. I’m not sure what that blooming is – perhaps a slow-ish shutter speed? In any case, I later manage to moderate it by turning off shutter WDR but this darkens the image.
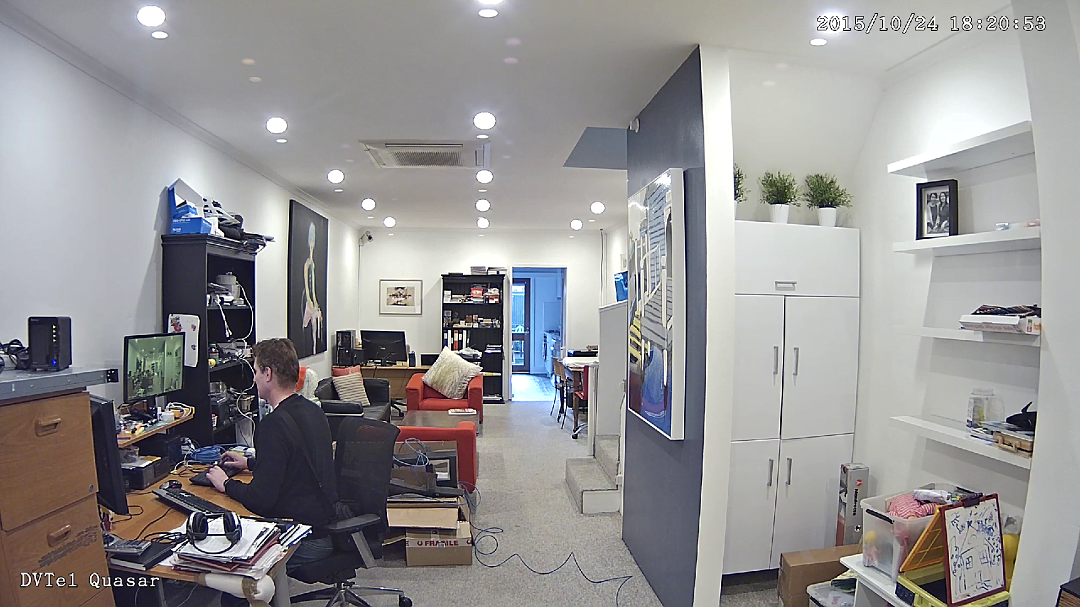
Office at 3mm – note the colour rendition, the WDR performance, the great detail and depth of field. There’s mild barrel distortion, blooming around bright points and some ghosting but no CAs.
My version has the f1.4 3-8mm varifocal lens giving angle of view between 96 and 38 degrees. This is plenty of range from my perspective – in fact the zoom feels stronger than an 8mm focal length and this may be because the standard 1/3-inch sensor size is changing the perspective for a given focal length. I’ve been looking at cameras with larger sensors than 1/3-inch lately. Thinking about it I come to the conclusion this sense is in great part because auto zoom and focus are so readily available in DVTEL’s spare but functional camera browser. All day long I keep using zoom because it’s just so easy. Push zoom, push focus, done – repeat. And it’s quick. No sitting around waiting while the camera plods through the entire focal length multiple times. Press focus, bang. Brilliant.
My intuition tells me there’s a little less latency in the remote controls with this camera than there was with the 4K but there’s nothing empirical about that observation. Something else I find myself doing all day is grabbing snapshots – more than 100 of them, thinking: “Oh, that looks good”. And 2 minutes later: “Oh that looks good”. In the late afternoon it occurs to me that I’m doing this because the general performance of the camera is strong.
The cornerstones of performance include excellent WDR capability in silly conditions that tend to force the processors of many other cameras into a state of deep gloom – they lose colour and become muted and grey. Then there’s the fact resolution is a significant percentage better – this makes image acuity and depth of field better to a very noticeable degree. It’s visible in wide scenes as extra details and reflections of shiny surfaces that survive the application of really deep digital zooms without fragmentation. No, it’s not 4K but it’s very good. Having increased resolution and better WDR performance in tandem – it’s a great combination.
Before I’ve even played with settings, I’m impressed with the way the camera handles views through the office, through kitchen and into the courtyard. Many cameras handle backlight at the expense of darkening the foreground – they automatically grab settings like quicker shutter speeds that favour a scene’s bright areas at the expense of darker areas. The result is an image stream that lets you see a face in a doorway but surrounds it with darkness. This DVTEL camera does not do that.
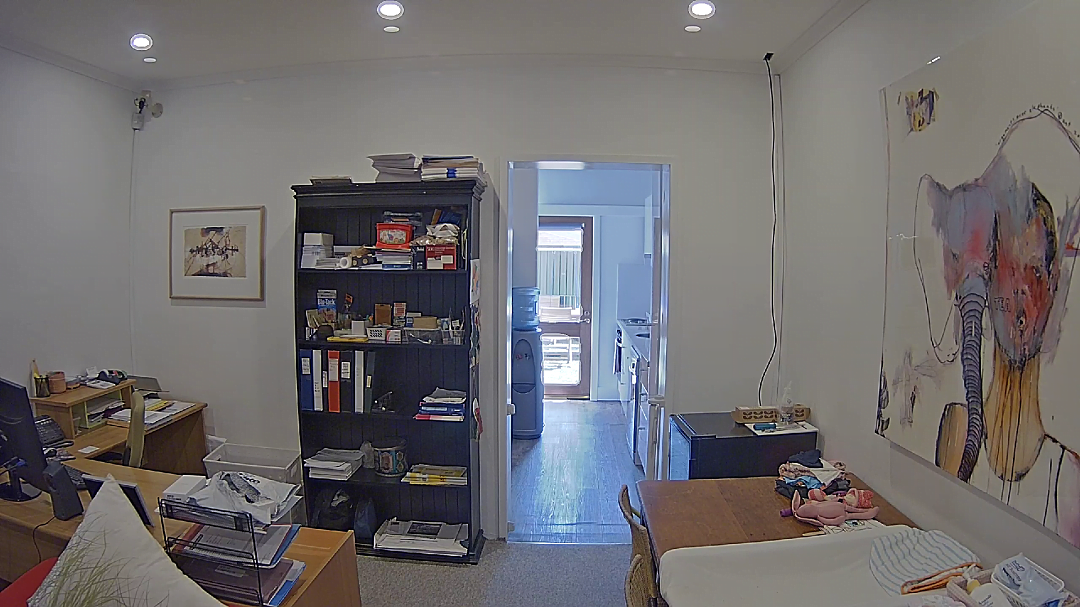

Both these images demonstrate the CB-6204’s unusually strong resolution and resistance to backlight.
Something else I notice at this early point in the test is a slight noise in the image, which I immediately decide is caused by an elevated WDR setting and I resolve to see if I can tweak it. My compression settings are H.264 only, 2560 x 1440 pixels at 12ips, H.264 1 set at 2380Kbps and H.264 frame rate at 12ips. My advanced camera settings end up being WDR function set to low (default was mid), Shutter WDR on, 3DNR to mid, 2DNR on, Colour NR to mid, and white balance at ATW. My minimum shutter speed is at 1/6th of a second and my auto P-iris is selected. The tweaking process lasts the entire time of the test, which stretches into a second day.
Of all these adjustments, I think moving WDR from the mid setting to low is my best selection choice. In the beginning, I keep moving back and forth from mid and low and each time I go to mid the image looks worked, a little pink-ish and with a hint of claymation that detracts from apparent image quality. This may relate to my environment – it’s bright out the back – we’re mid-spring in Sydney, so light levels are up over 70,000 lux in the mid afternoon and our test point overlooking Surry Hills is mercilessly exposed. Nevertheless, keeping WDR at the low setting still gives me outstanding performance in full sun. I don’t have the sun actually in the image in this test – at one point it’s in the sky above the sunshade – but this camera does brilliantly in the conditions.
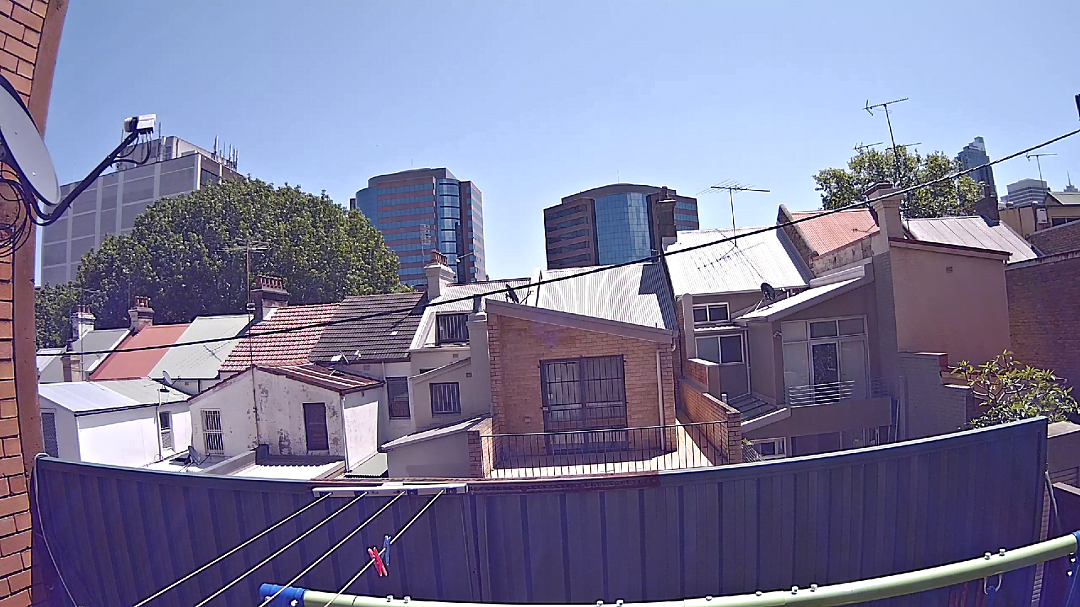
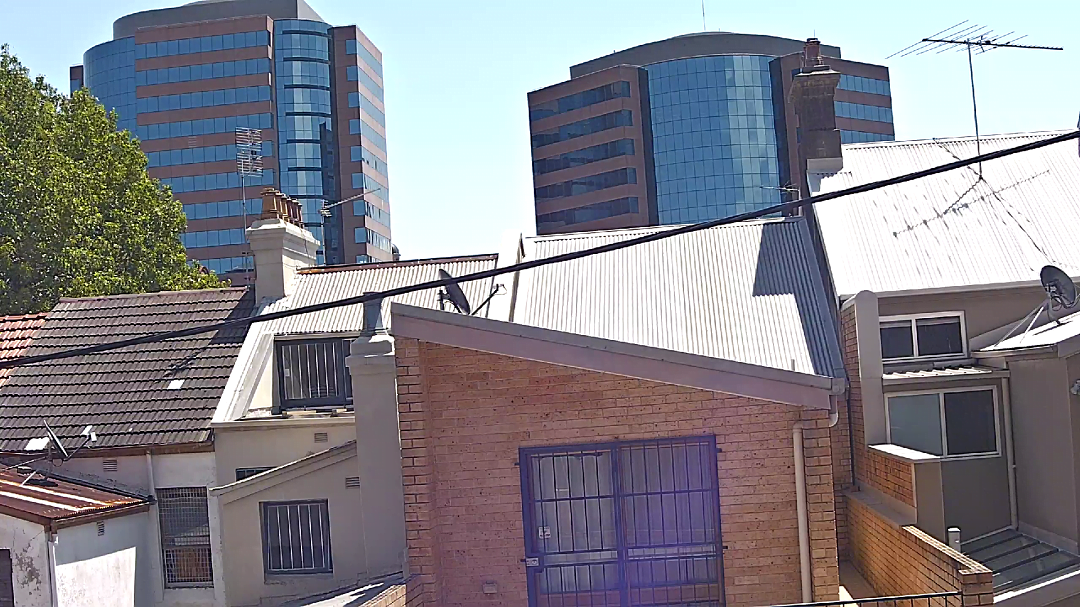
District view, first at 3mm and then at 8mm. I used the remote zoom a lot – you will, too.
Something else I do is play with my picture adjustment settings. Late in the afternoon – about 5.30pm summer time – I’ve landed on +3 for brightness, +5 for sharpness, +1 for contrast, +1 for saturation and +1 for hue. Bear in mind, these tweaks aren’t the percentage-point shuffles you undertake advancing the sliders in Corel or Lightroom. If you go up a number in a CCTV camera browser you are taking a sizeable step and you notice the difference. Perhaps as a result of this, I find subtle changes are best.
An entire mid-morning to evening test out the back of the office with scene detail stretching from 1-1500m and light levels falling from more than 70,000 lux to sub-1.25 lux at the lens, always finds a camera’s quirks. In the case of the CB-6204, with the camera pointed upwards and the sun just above the field of view, I get flare. I don’t think this has anything to do with the lens itself – it’s the curved poly housing window.
The lens itself has a standard Magnesium Fluoride coating targeting/reflecting the 550nm (crimson) midpoint of the visible spectrum and while this does well in the tough conditions, the housing window and lens combination contrive to form a curious crimson double diamond ghost in the centre of the image with the sun directly above the camera. Zoom in or offset the camera slightly and this compact little ghost is gone.

There’s the interesting little ghost – I think it’s a reflection between the lens coating and the curved housing window – there’s no impact on image quality.
All integrated lenses covered by poly lens windows exhibit some form of flare or ghosting and the usefulness of the image stream is not impacted in this application. Typically, installers won’t point cameras slightly upwards as I’m doing here. Something else I notice as light levels fall away is that this camera feels a drop in light levels – there’s an impact on scene brightness. When the sun comes out from behind a cloud the image suddenly pops!
Further, when there’s a lot going on in the scene, say 30 per cent of the scene moving – I note some motion blur. This seems to depend on the application. Out the front with people, trees, cars, I notice it at wider angles, which is typical. Out the back with less movement at a focal length of 5mm, foreground clarity of moving trees and bushes is great. I can also see the slight stepping of the 12ips shutter speed but there’s no blur.
I also have a sense out the back as light levels fall that the image is brighter in wide angle – there’s not much in it but the loss of aperture with mid-point zoom of 5mm in the 3-8mm varifocal might be enough to cause some scene darkening. Later in the afternoon the wind picks up and yes when there are very large amounts of movement (30-40 per cent of total frame) in a wide scene, I notice 1 or 2 hundredths-of-a-second moments of latency which may be due to the live display exhibiting slight variations due to the increased I-frame size. When using a camera browser to view a live video feed, a web-page may not have adequate rendering buffer size to smooth this behaviour. It’s a characteristic I’ve seen with many other cameras when the entire scene is moving when viewed via web browser. In this case it’s happening at a higher than usual resolution.
In any case, the district detail provided by this camera at 5mm in good light is brilliant. Depth of field is painted in all the way up to the Memocorp building on Oxford Street – more than 1000 metres. The dark coloured brick wall 40m up the lane looks great, each brick distinct. Barrel distortion is very mild at a 5mm focal length and the resolution is considerably superior to any 1080p camera. Autofocus and zoom in applications where the camera view is in enfilade of a long, deep scene like a street or alley – the value of these functions can’t be overstated. They turn the CB-6204 into a fixed zoom camera – you can’t pan and tilt in real time but with clever selection of field of view during commissioning, you can dive in deep during live monitoring – it’s great value for your spend.

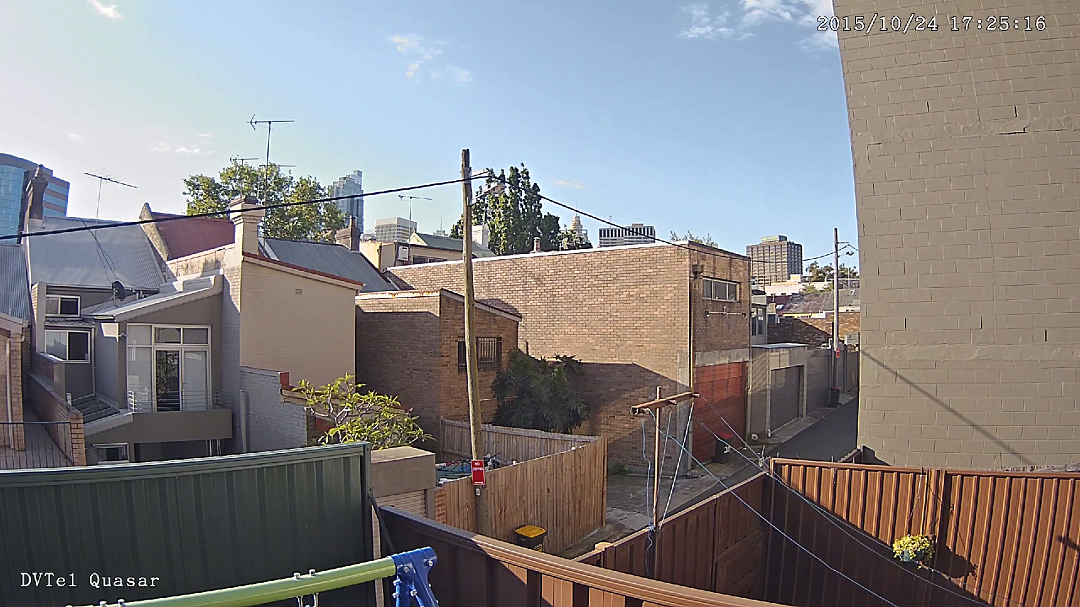
These images are taken in the same light, the first at 5mm, the second at 3mm – reduced aperture at the longer focal length may be reducing light levels at the sensor.
As the sun goes down, I increase saturation to 3. I play around with some other numbers but most my choices introduce some level of digital work or noise into the image that I’m unsatisfied with and I return the sliders to where I had them. The only CAs I see at any time occur late in the day along the power line top right of the lane.
At 6.49pm, I measure light at the lens at 1800 lux. The colours in the scene are softening to pinks and mauves while still retaining distinct colour rendition. There’s still plenty of contrast. The excellent resolution remains my strongest impression when looking at the monitor. By 7.08pm the light is down to 500 lux. The image is darker but it’s consistent in all other ways – there’s still strong depth of field – that’s usually one of the first things to go as light levels tail off.
The other thing I’m waiting for as light levels fall is noise – it’s inevitable and I keep peering at the brickwork around me looking for swim in the image and for the flat, plastered look of digital smoothing as the process or tries to combat it. As light at the lens falls passed 500 lux, the light in the neighbour’s office window starts to show. Generally, this scene looks very nice. It’s softer and has more of a mauve tint but levels of detail remain high. Now it’s 7.16pm and the light is 190 lux at the lens on my Sekonic. Blooming is beginning to appear around street lights in the lane but the scene is still reasonably tight and quite deep, noise is minimal. However, some surfaces are starting to lose detail.
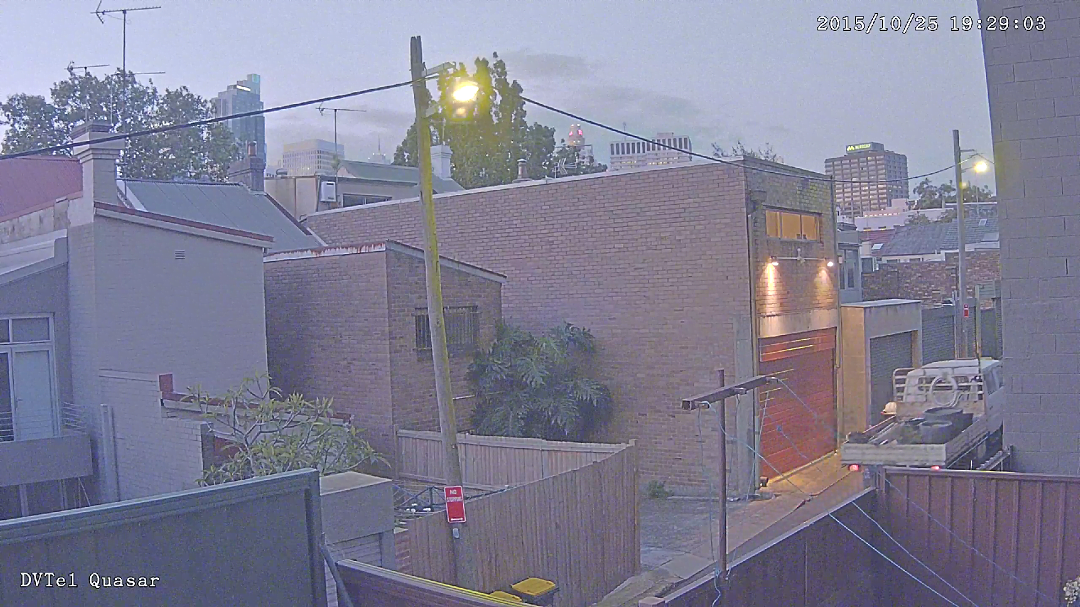
Good performance here – the truck in the lane was doing about 25kmph.
Just after 7.30, with light at around 23 lux, things get interesting. In the space of about 35 seconds the image alters as the camera selects a higher level of amplification, or slows its shutter speed. The scene is suddenly much brighter and the bloom around the low pressure sodium streetlights is much more intense. The image stays this way, holding colour. At 7.39pm I measure 6 lux at the lens and the camera is still holding colour – the streetlights are still in bloom but the scene is generally very good, with plenty of fine detail.
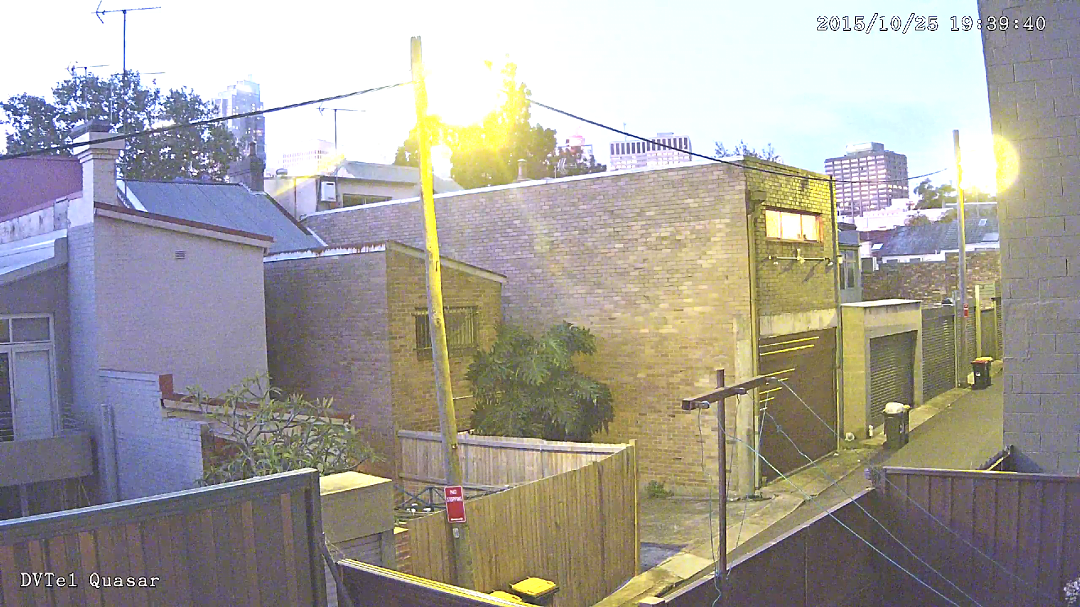
At 7.41pm and 4 lux at the lens, the camera switches to night mode. The IR activates and we’re in monochrome. Noise is not too bad. Situational awareness is good still – finer detail is no longer there – you expect that but the depth of field is solid and the camera’s strong resolution remains apparent. At 7.43pm I set WDR to mid and 3DNR to mid and I think that improves the image a little. Having streetlights in the scene when we’re in IR is hard on the camera, though it does reflect many real world applications. At this point I turn the camera away from the lane and take a snapshot towards Elizabeth St with under 1 lux at the lens and notice IR range is at least 30m.
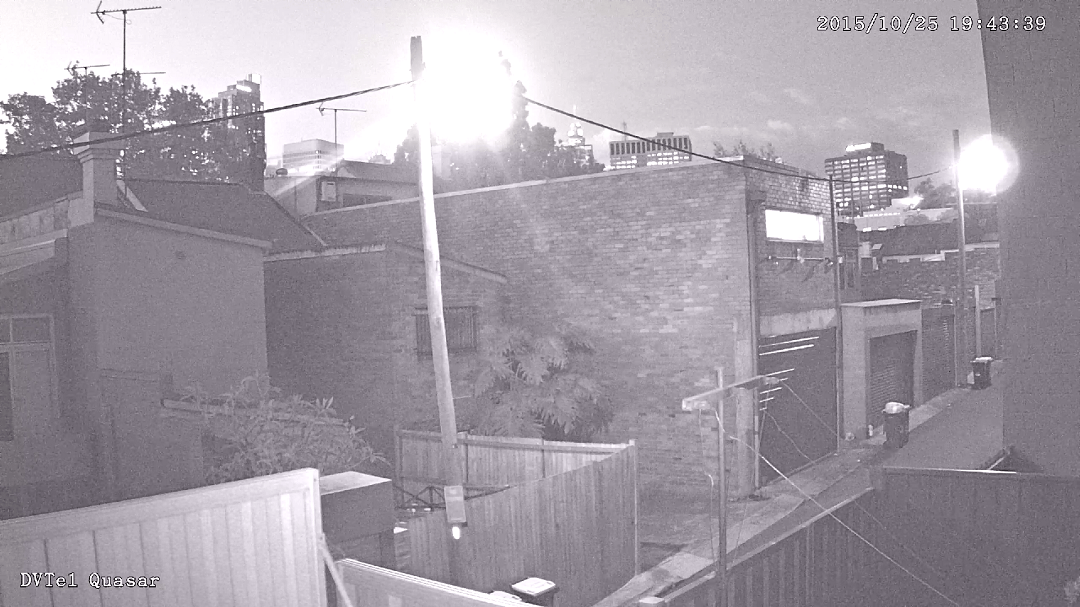
Blooming and some noise in both these images of the lane but great detail throughout.
Now I lug camera and Manfrotto through the office and out onto Bellevue Street. At 7 lux and a 5mm focal length, this camera holds colour and never loses it. There’s yellow shift in the image but depth of field is better than any 1080p camera I’ve seen in this application – it’s that monster resolution shining through. The tendency towards blooming of streetlights, tail lights and headlights remains but it’s no impediment to situational awareness in this test.
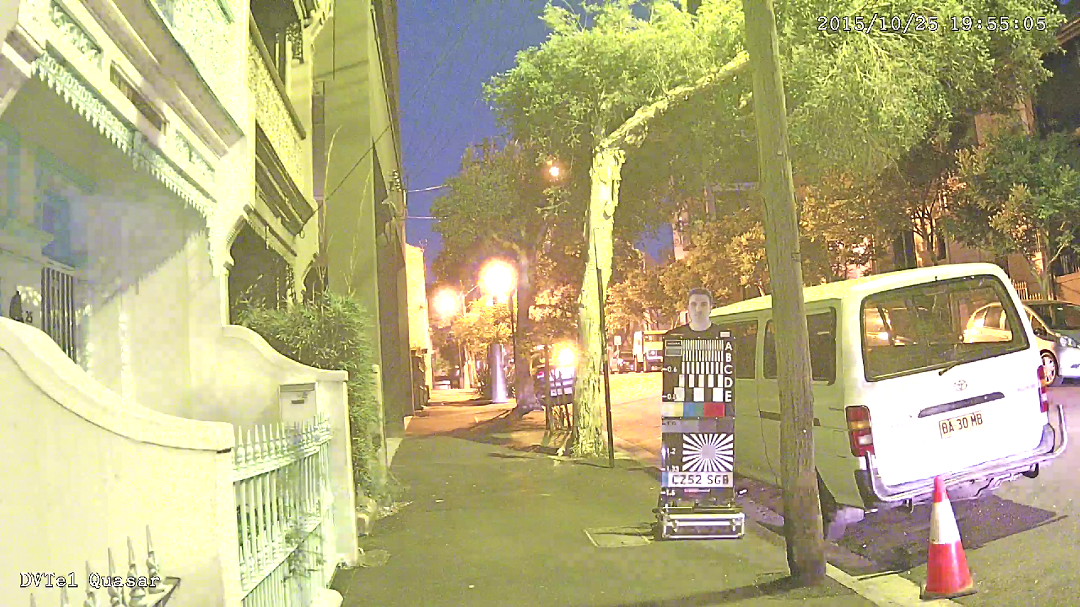
Norman at 8m and a focal length of 5mm. You can see blooming and increased noise from elevated ISO in these colour images.
At 8m I have face recognition of Norman and all the measurement scales on the target are distinct. At 12m, I could identify Norman if I knew him and there’s distinction of lines from C down. At 16m, I’m losing distinction of the bars on the target and the flare coming off Norman’s face from the Yaffa floodlight is rendering him unidentifiable. A car goes by and I grab a shot but later can’t identify the car type – I think this must be down to a relatively slow shutter speed at these settings. The fact I can see a car at that distance is worth pointing out.
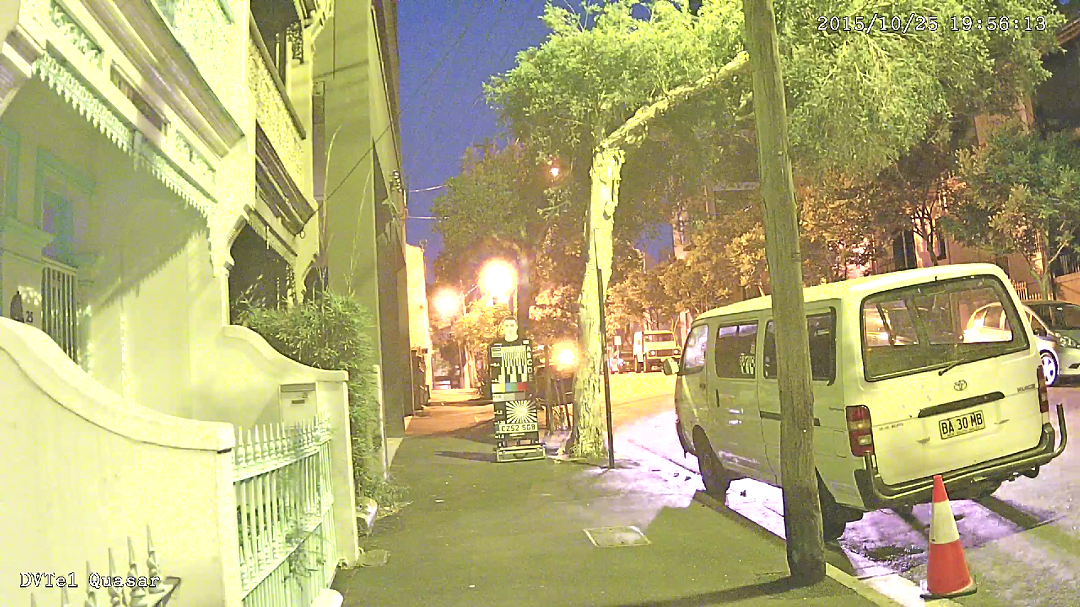

Top image is 12m, bottom is 16m, both at 5mm focal length
With Norman at 22m and away from the floodlight – it puts about 15 lux on his face, remember – I have much more detail of Norman. His license plate is indistinct but I have clarity of the D line and colour rendition remains very good. I find I can still use digital zoom to my advantage out here – again, the increased resolution makes a big difference.
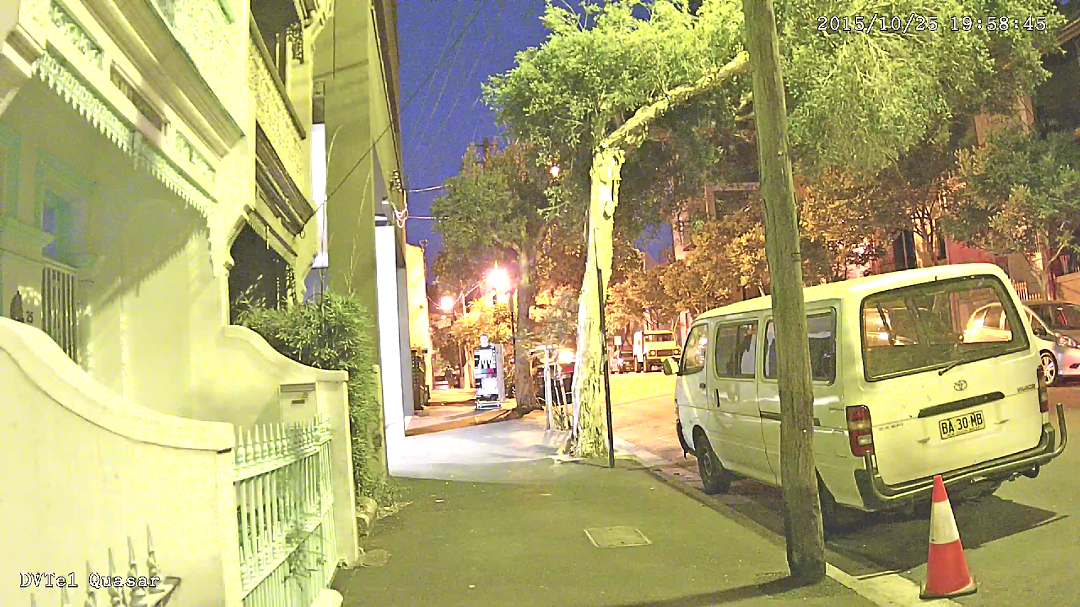
And at 22m…
Finally, I turn the camera down towards Foveaux St and take a shot with 12 lux at Norman’s face. This static scene is another really good image from the CB-6204. Resolution is strong, colour rendition is very strong. There’s detail in reflections of car bodies, the texture of rendered walls in the USQ building next-door, the shape of new leaves. DVTEL’s Quad resolution actually means something.
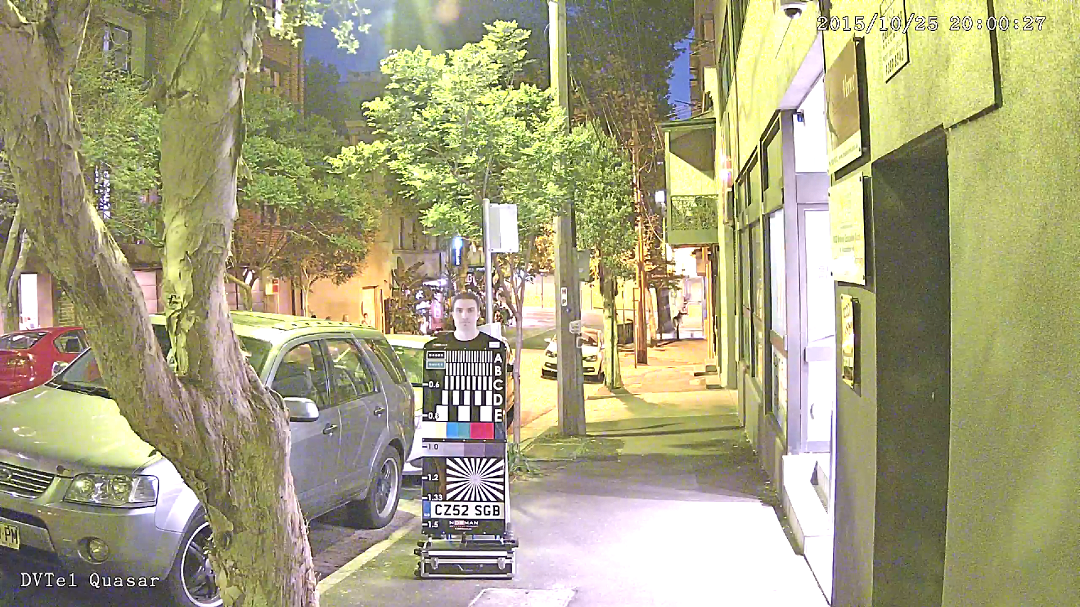
Looking down the street – very high levels of detail – look at the rendered wall to the right…
Next day, I take Norman and the CB-6204 out the front for a daytime test and again I’m impressed by the depth of field, the colour rendition and the mighty angle of view at the shortest focal length. This angle of view does spread the pixels a little, however, and in such a deep scene digital zoom is not as impressive as it is indoors at 3mm.
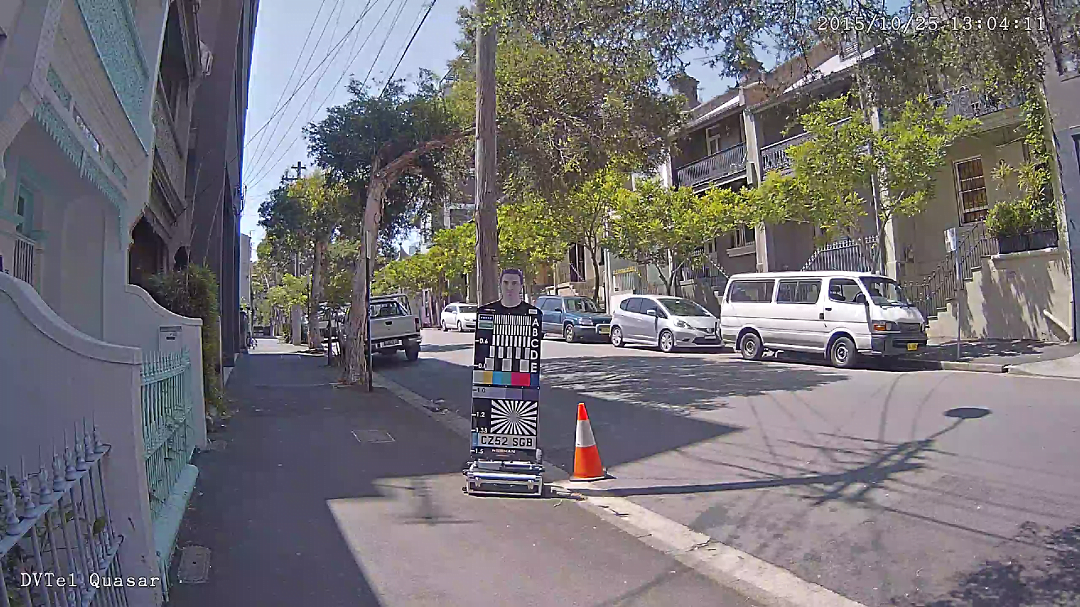
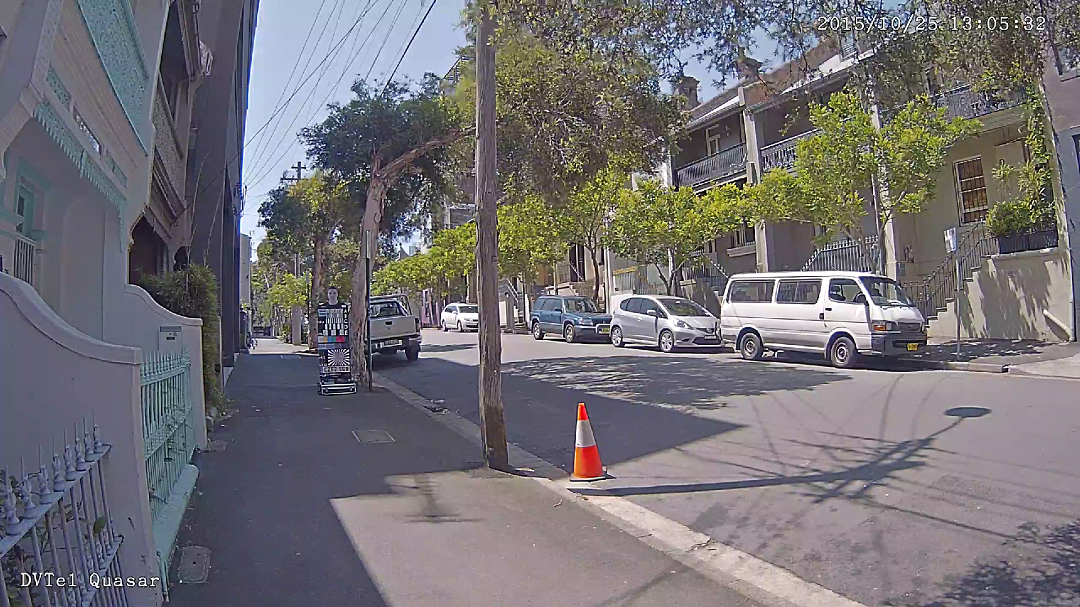
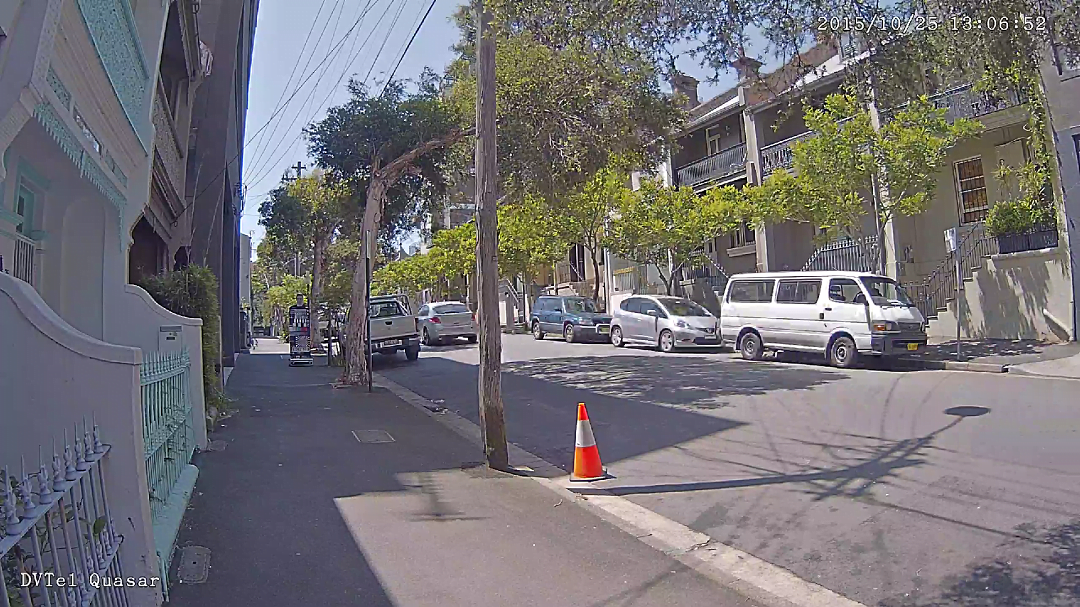
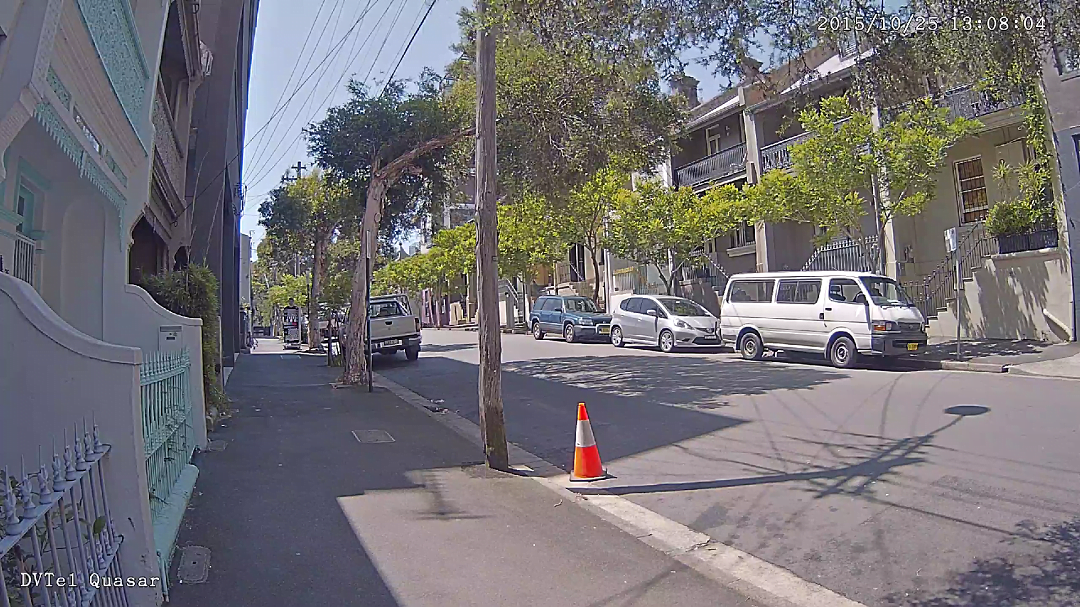
These are great wide angle street scenes – I’m losing detail thanks to pixel spread but it’s still way better than 1080p would be. Again, excellent resolution and resistance to WDR.
After running through my tests at a 3mm focal length, I note I have face recognition at 8m and near face recognition at 12m, but am losing faces and license plates at 16m. Because I generally test at 5mm, I decide to run through the process again at the longer focal length.
Concentrating the pixels makes a big difference. At 5mm, I have near face recognition at 22m, license plates at 22m and delineation of the target bars from the C line. When I bring Norman back to 16m, he’s in the shade, so I don’t get face recognition, but now the B line of the target has separated out and license plates are effortless. I notice again that depth of field is distinctly superior to 1080p.
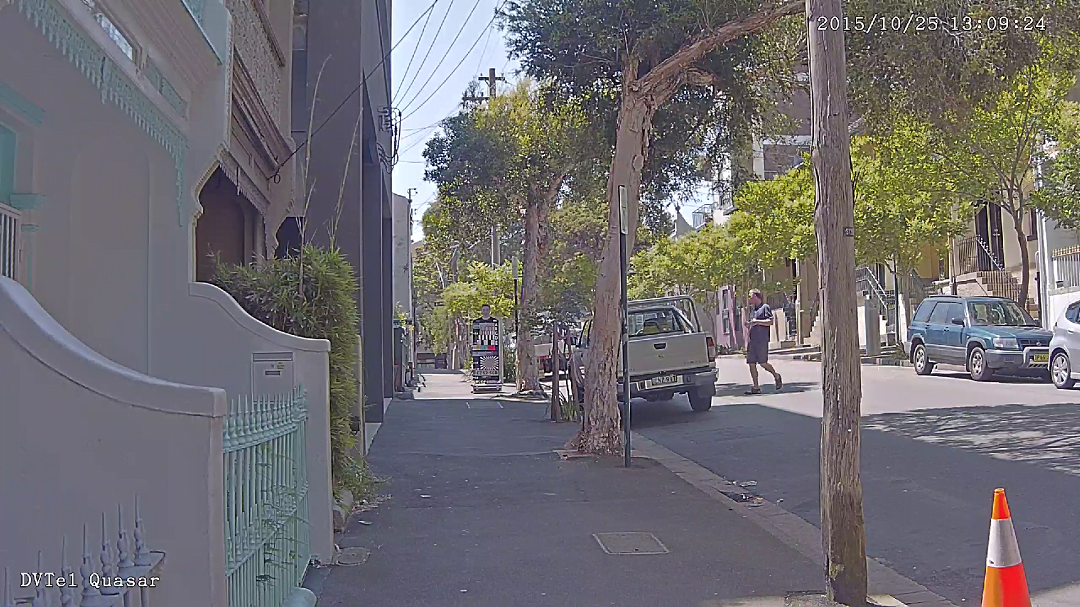
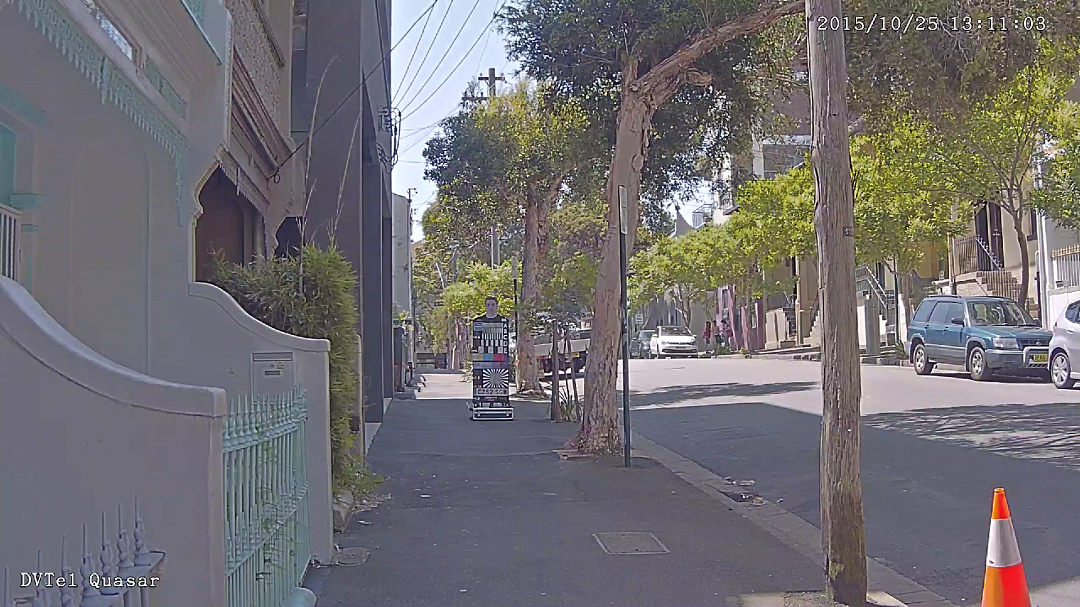
At 12m I can see full detail of Norman including the B Line and at 8m I’m getting all it’s possible to get from my test target. Spinning the camera around and looking down the street – still at 5mm – I get great detail that beats 1080p. A car goes by and I snap it, later noticing I don’t get the plate, but can see the make, model and colour. Again, a slow-ish shutter speed may be contributing here.
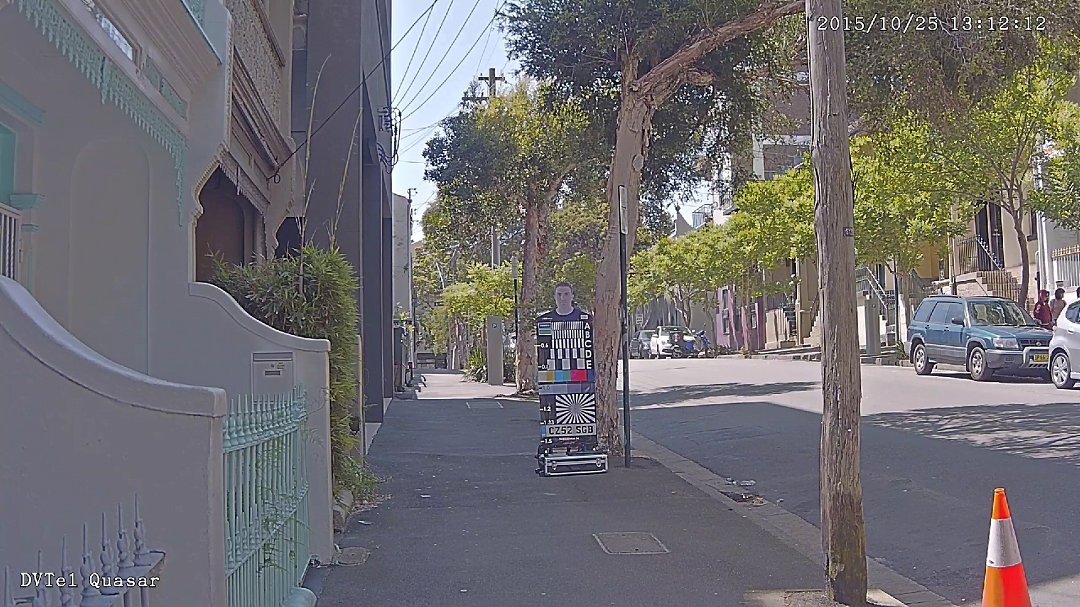
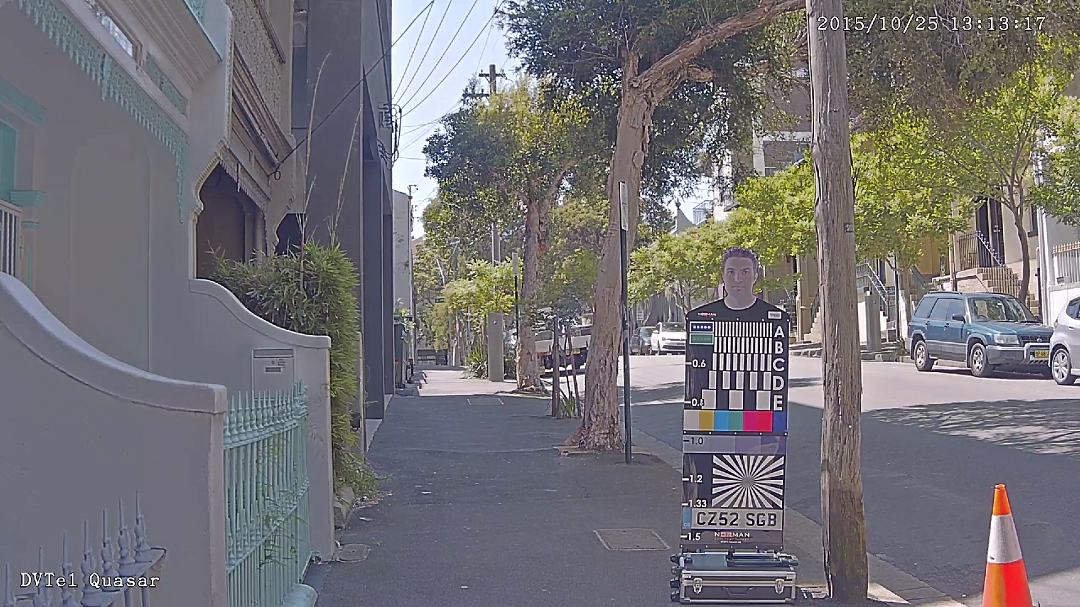
The different look of the framing of images in this test is the higher tripod setting.
Looking at the scene generally, I’m getting good situational awareness of human-sized objects at 50m, as well jagging clothing and handbag colour, I can even discern a road sign on Albion Lane – that’s a first. This scene has very strong gradations of sunlight and shade and the DVTEL is utterly un-phased by that – most impressive. Colour rendition is great, paint reflections are apparent at surprising distance. Again, the brighter the scene, the better this camera does during the day. At some levels of ambient light when a little extra light hits the scene, it brightens considerably as though a light has been switched on.
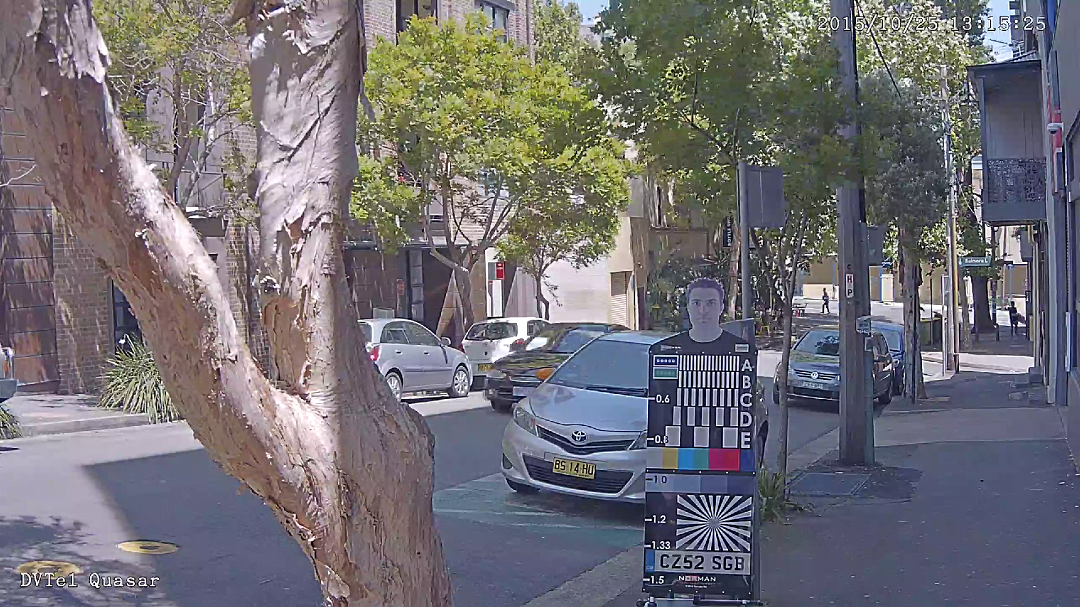
Great detail and depth of field. Look at the situational awareness all the way down on Foveaux St.
Next, I do my WDR test at the back door. From two thirds of the way up the office with full sun coming in (73,000 lux) and the top blind up (I usually have it down), the camera is doing really well. What’s most impressive is how balanced the entire image looks, from foreground through to background. In this regard, I really rate the DVTEL CB-6204.
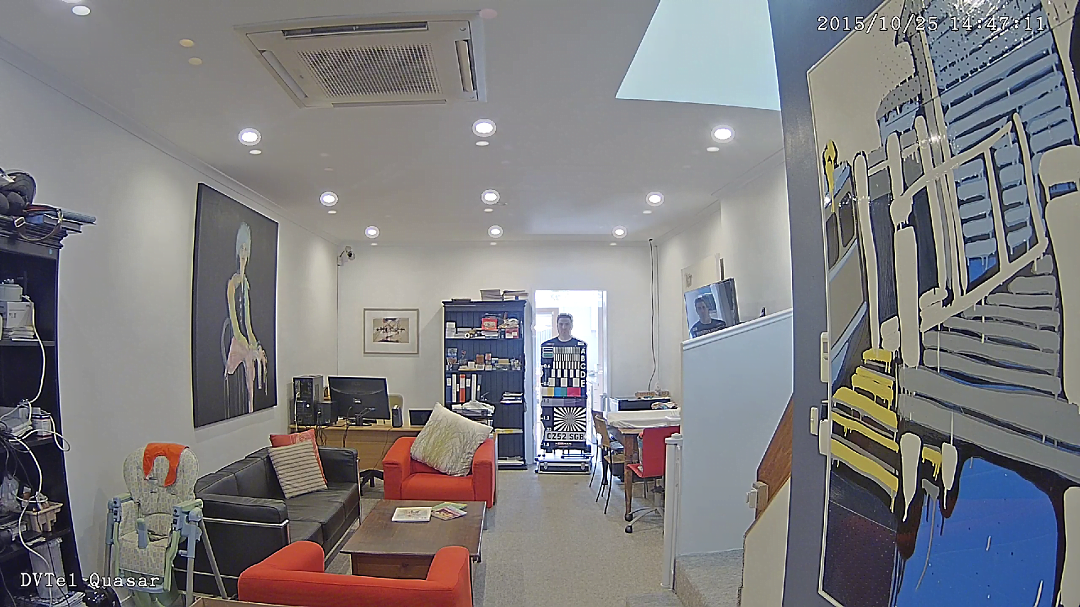
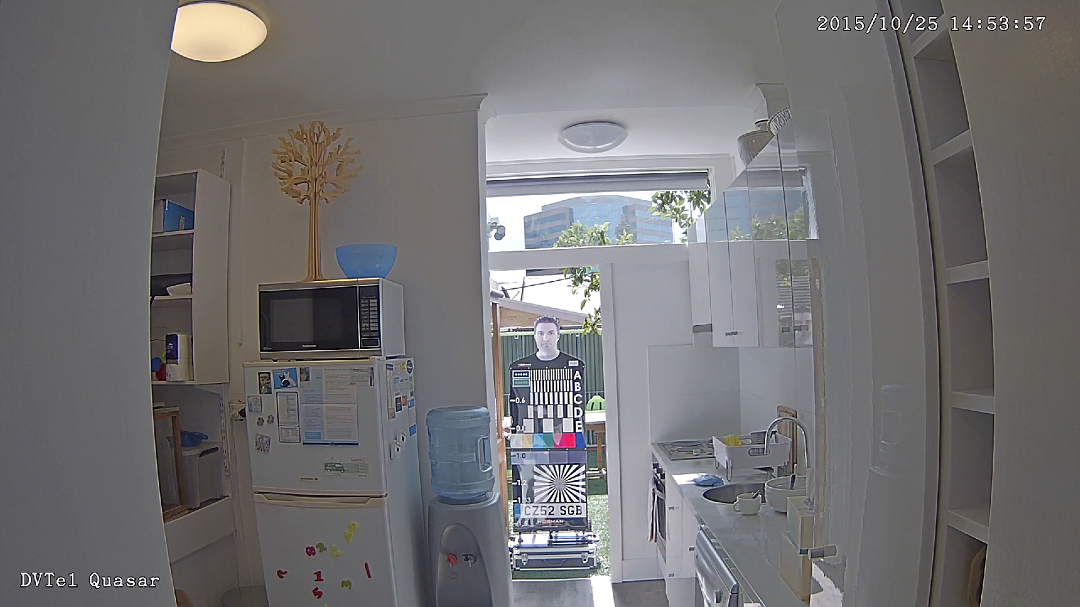
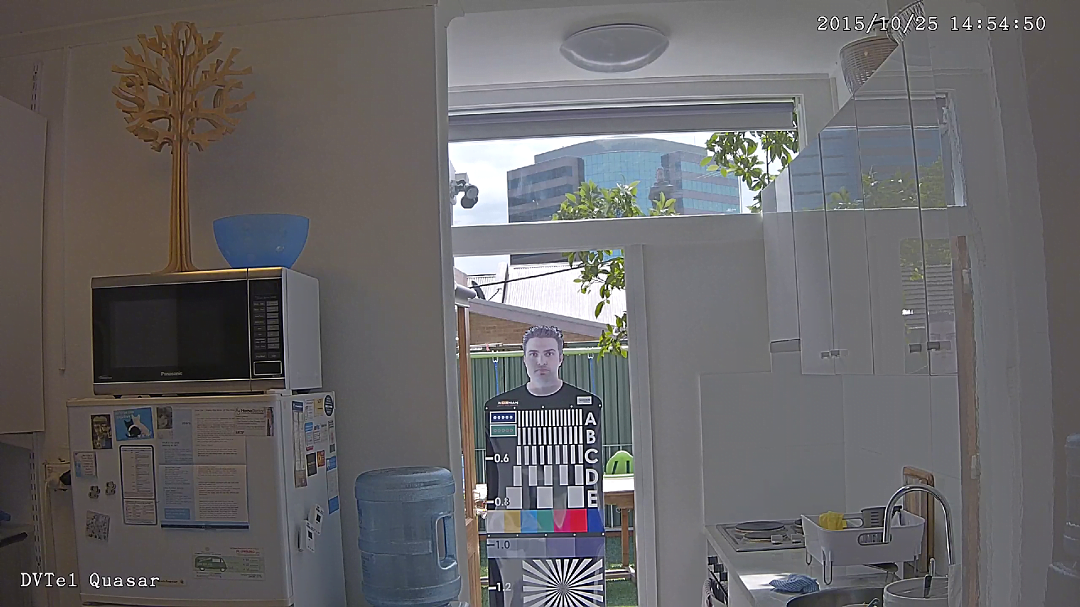
These 3 images are in the second half of the afternoon with around 75,000 lux in the courtyard and the top blind rolled up. It’s exceptionally fine work from DVTel.
I grab another shot looking through the kitchen with Norman outside the back door and again, it’s the quality of the entire scene that impresses rather than any single element of performance. The detail, the colour rendition, the lack of bloom, the consistency of light levels, the lack of chromatic aberration are all strong together. This particular view – and the camera is now back at 3mm – is the most complete WDR performance I’ve seen yet in the office application. When I reel the scene in to 5mm, the image stays tight and I could swear that light levels drop off as aperture tightens.
Conclusion
DVTEL’s CB-6204 is a fine camera. With additional resolution from its 2560 x 1440 pixel sensor and strong performance in backlight that seems completely disconnected from the quoted WDR numbers, the CB-6204 offers considerable operational benefits. DVTEL says the Quad 1440P sensor in this camera has 76 per cent more detail than 1080p. Is this true? Yes, I think it is. The increase in resolution is distinctly noticeable, especially when you spin your mouse wheel.
The more time I spend with this camera, the more I appreciate its capabilities. I love the remote zoom and I find myself using it constantly – any operator would feel the same way, to say nothing of the ease and economy of post-mount commissioning and re-commissioning. The DVTEL camera browser is a pleasure to use, too.
What are the particular strengths of the CB-6204? Back-to-front WDR performance with internal to external views, external WDR performance in silly levels of backlight, low distortion levels for such a wide view, lack of chromatic aberration at all times, great colour rendition and very strong detail and depth of field delivered by its higher resolution. If your application demands these sorts of performance parameters, this camera is worth a closer look. ♦
By John Adams
Features of the DVTEL Quasar 6204 include:
* 2560 x 1440 pixel resolution
* Multi-shutter WDR options
* Multi-streaming at highest frame rates
* 1440p Quad HD at full frame rate and the lowest bit rate
* P-Iris
* Indoor/Outdoor
* Vandal Resistant
* IR Illumination 40m and 60 degrees
* Web interface for viewing and configuration.
* 1/3-inch BSI progressive scan CMOS
* IP66 and IK10 rating
* f1.4 3-8mm lens with 96 to 38-degree angle of view.


