How To Install PIR Sensors In Security Applications.
How To Install PIR Sensors – PIRs are designed to be installed indoors unless microprocessor controlled and waterproofed to cover moderately broad open areas, medium-sized rooms and longish corridors, as well as smaller spaces. They’re also ideal for use when factors like noise, inanimate movement and vibration won’t permit the use of microwave alternatives.
PIRs can be masked against known IRE sources, are compact, can be recessed or flush mounted, and are sold in 360-degree ceiling mount variations. Infrared detection devices can also be used when there are areas of glass forming a boundary to the target area if that glass is not subject to direct sunlight – typically under veranda rooflines.
Successful use of passive infrared detection demands a stable IRE environment so look around and make certain there are no heaters or powerful lights in the room likely to generate excessive infrared energy levels.
PIRS can’t be located facing receive unfiltered sunlight and nor should they be used anywhere there will be sudden temperature changes on surfaces within the target area. Exposure to glass surfaces should be space divisions in office or home environments environments – not perimeter glass – unless that veranda keeps direct sun off.

Other potential problems with PIRs include humidity, unsuppressed electrical equipment that could cause interference (this includes things like fluorescent lights), and dirt and dust in the environment. You can effectively seal PIRs and conformal coat their boards if you’re installing them in tough environments like bathrooms, garages or covered ways.
Another mistake is to install PIRs in environments in which cats, dogs, birds and flying insects are present, unless the sensors have been specifically designed to resist these false alarm signals through sensitivity adjustments, microprocessor control or lens design. In the past, pet immunity meant keeping the IRE sensitivity above knee or thigh level with lens design, creating what was called a pet alley. This was effective up to a point, especially with small dogs, but climbing animals like cats are likely to leap onto lounge chairs or tables causing false alarms.
Before the sensor goes in, you need to know the layout of the sensor’s zones – these are defined by lens design. Always check the specification sheet before installation and ascertain the sensor’s strengths and weaknesses. The PIR should be installed so it positions the maximum number of zones at right angles to what is the most likely track of an intruder. Passive infrared sensors are far more sensitive to changes between live and dead zones and live and live zones, than they are to changes within dectection zones – be sure to take advantage of that underlying fundamental.
How To Install PIR Sensors
A typical PIRs is designed to activate if a certain number of zones is breached in a given direction at a given speed, so install the sensor in a way that will allow it to pick up the most likely line of an intruder’s passage at right angles.
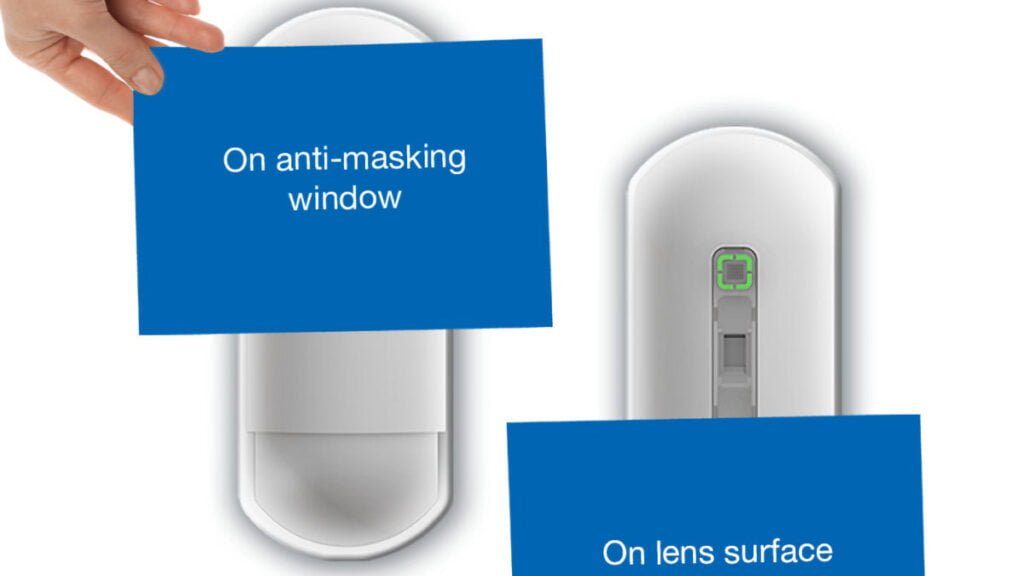
If the PIR you’re installing has no anti-masking feature, make sure it’s positioned so an intruder will have a hard time reaching it to mask it. Most modern sensors have anti-masking but the cheaper ones will be devoid of this feature and are vulnerable to masking by anything from sticky tape to spray paint. Smart sensors will alarm if they think they’re being deceived in this way.
Look for creep zones, too. These lookdown zones are achieved by clever lens design and they make it much harder to approach a PIR from below.
Making sure you install the sensor at the correct height is important, too. All other things being equal, we’d be thinking higher elevation is best, so long as the sensor’s catch capacity is not impacted. Higher up means less likelihood of blocking, earlier detection in cluttered environments and it makes the sensor hard to reach if intruders are seeking to mask or tamper.
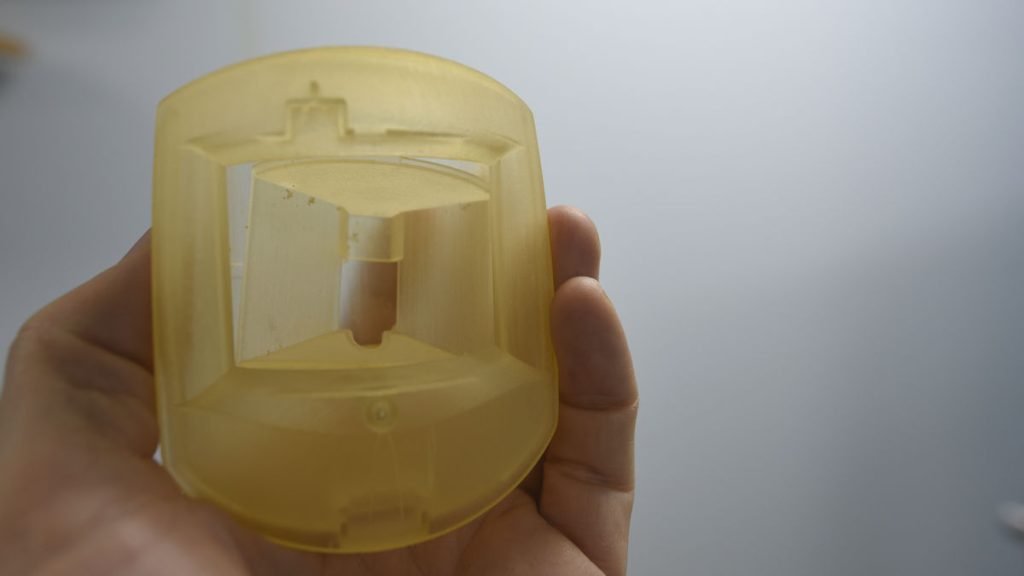
Lens design is another important issue with PIRs. Using the wrong lens will lessen a PIR’s effectiveness. Some sensors will be supplied with a choice of lens and others will endeavour to offer of both broad coverage and long-range patterns from a single design. There are 6 primary lens patterns – these can be applied generally to both fresnel lens types and mirror optics:
- Long range, dual zone, narrow coverage lenses are used to monitor narrow corridors with crossing points to protect long rows or windows
- Long range, multizone, narrow coverage lenses are designed for use with long corridors without crossings in which intruders will move towards or away from the sensor
- Multizone curtain lenses are mounted on ceilings above entrance doors or in glazed areas. They’re a detection fence from floor to ceiling and any intrusion through them will generate an alarm
- Broad multizone, wide angle or volumetric: These lens types are the most common found. They are more sensitive to movement across a protected space at right angles to their radial zones. They’re ideal for smaller spaces in domestic homes and small offices
- Ceiling mount PIRs have 2-zone, 360-degree coverage, with conical zone arrangement arrayed in two circumference lengths. These sensors are ideal for use in offices that have large numbers of partitions between waist and shoulder height. Multiple installations generally employ overlapping pools of detection.
We like mirror optic lenses in tough environments. Having spent time fooling around with some mirror optic PIRs, SEN came away impressed with their effectiveness at long range. But in most cases mirrors mean greater expense, so there’s a decision to be made with lens choice.
Some of the advantages of PIRs include low false alarm rates when compared to microwave and ultrasonic sensors, miniscule power drains, no energy emissions, no moving parts and simple electronics. PIRs have a longer detection range than ultrasonics, are cheaper than most other technologies, will not interfere with each other when installed in groups and can be adjusted in terms of lens pattern and sensitivity while in the field.
There are disadvantages with the technology, too. For a start, increases in ambient temperature will affect a PIR’s range and sensitivity. And it’s possible for intruders to wear a suit or carry a shield that reflects body heat to beat PIR sensing.
How To Install PIR Sensors
There’s not the density or uniformity of coverage with PIRs that you get with other technologies. There are dead zones and it’s possible for furniture or pallets of stock to block the sensor’s view. Nor will the PIR alarm if the sensing element fails – something that beam sensors will do. Generally, the PIR sensor’s detection range is limited to 15m x 15m x 50m in wide angle and 50m in narrow beam, or a circular 15m pattern.
Other disadvantages include the fact random IRE signals may cause false alarms and there’s a maintenance requirement. Lenses and mirrors need to be kept clean and insects and other pests kept at bay. In dry, dusty environments, particles will be electrostatically drawn to the device where they’ll stick and cloud its vision.
There are features installation companies should look for and end users should demand when installing PIRs. To begin with, look for sensors with dual edge or quad sensing zones and an array that offers a significant number of look down zones, as well as more than one sensing range and the greatest possible number of discrete zones.
You want surge and low voltage protection, as well as RFI suppression, pyro electric sensing elements, adjustments letting you alter the range or mask zones, as well as LED-supported latching. Walk-test is a valuable feature and a plug-in test meter is an advantage.
Other valuable features include fast-change sensor head, anti-masking (a low power active infrared transceiver), tantallum capacitor-based RFI and EMI protection, a high signal-to-noise ratio, trouble log capability, auto self-test capability and temperature range of -10C to +50C or better.
Another beneficial feature in PIRs is temperature compensation. This feature adjusts sensitivity in line with increases in environmental temperature in the target area considering that some locations may approach or exceed the temperature of the human body. When this occurs, an uncompensated sensor may have a detection range of just a few metres.
Once the temperature hits +35C, any PIR is going to be seriously disadvantaged even if temperature compensation is winding up that tiny pyro signal through a specially designed amplification circuit. The answer is never to challenge a PIR’s long-range capability in hot climates and, at the risk of being thrown to the wolves, we’d recommend halving the quoted range when designing your system. In Australia, especially in the north, installers putting in PIRs should think overlap, overlap, overlap.
Additional features in a quality sensor include silent alarm relay, multi-facted reflectors, low voltage signal; enhanced processing linked to rate and rise of threshold, duration of zone disturbance and intruder presence in both elements; a tamper contact, site-adjustable sensitivity and first-to-alarm memory.
You can read more about PIR technology here and see more SEN news here.
Features of importance in PIRs include:
- Zone pattern and range
- Latching LED
- Window type
- Fresnel or mirror lens
- Recess options
- Walk test capability
- Mounting or tilting brackets
- Factory test EMI/RFI resistance
- Operating voltage, current draw
- Maximum operating temperature
- Temperature compensation
- Modular electronics
- Anti-tamper, anti-mask
- Preferred mounting height.
“How To Install PIR Sensors In Security Applications.”


