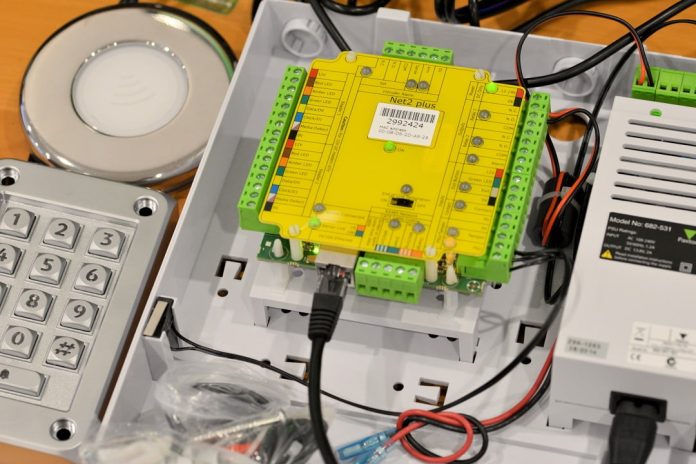
Paxton Net2 plus intelligent controllers are said to be the easiest access control solutions in the world to install. With help from local distributor Security Distributors Australia, we decided to put those claims to the test in a 2-Part installation series.
SOME time ago there was a loud knock at SEN’s front door and a large box was delivered. It was heavy and a suitably portentous opening ceremony revealed many more boxes within which I found the heart and limbs of a Paxton Net2 plus access control system. Swirling around the controller was a range of Paxton devices – a keypad, a prox reader, an intercom, door locks and other things I was too frightened to open.
We test cameras at SEN, we’ve even installed an alarm system using an actual drill. But we’ve never tried to tackle access control. All those doors and the feared complexity of enrolling users – it was just too much. The fear of what was inside the box grew with each passing month, until it became a wall of procrastination.
But at Security 2015 Expo a conversation with local distributor Wayne Krahner of Security Distributors Australia served to damp down my fears and encourage me to move outside my comfort zone. According to Krahner, Paxton’s maxim is simple, simple, simple. Well, it’s going to need to be, I told him, with a hollow laugh.
According to Krahner, he’s been very pleased with the way the Paxton product has been received locally.
“The Australian market is well catered for in the high end but it’s not as well catered for in the low end and the middle part of the market,” he explains. “The lack of a need for licensing with Paxton and the simplicity of the software – that’s what impresses people so much, how easy the software is.
“Paxton is an integrated and open system so it will connect with multiple readers and it’s open platform so it doesn’t need to have its own proprietary readers attached to it,” Krahner says. “This makes Net2 plus very easy to integrate into existing systems or to expand. It’s also a smaller system with a lower cost entry threshold yet it still allows you to expand into other products and other markets – like intercoms.”
To fortify me for the challenges ahead, Krahner gives me a quick demo of a door setup.
“I’ll show you something simple in the software,” he tells me. “When the devices are on a network and we scan that network, the devices will just pop up and you can see the MAC address, you select those devices you want to use and click ‘Apply’. When you go to the Doors in the Net2 software, they should all appear up there with a green tick showing that they are all online. In this example, the ones are showing the signal strength of wireless controller, 2 are wireless door locks – allows you to make sure signal and battery strength are ok.
“And this is how we program a door,” he says. “In order to get all these devices functioning as an access control system – we give them a name: Backdoor, front door, side door, then designate how long we want the relays to operate for. We then go to reader one, say it’s a Paxton reader, we can choose between clock and data, reader and the like. In this case, it’s a Paxton keypad.
“We then go down the operating mode and select how we want the system to operate – we could select token only, pin only or token plus pin but let’s select all of the above. It’s already defaulted to all-day, every day. And there – it’s done. That’s the door programmed.
That sounds pretty easy, I laugh.
“That’s the message we want to get out – there is nothing easier out there,” explains Krahner. “If I want to do reader 2 on Net2 plus, well it’s a repeat of the process. And if I want to do alarms for door open too long or forced door, there’s a little check box so I can select how I want that to work. When it comes to codes, which are generic for a door not a person, we can enter codes for that door right here.
“Every Paxton reader comes with 5m of cable. That cable is colour coded to match the controller’s colour code – red to red, brown to brown, you can’t make a mistake. We really have got one of the more powerful access control systems in the market and we believe there is nothing easier.”
There’s more on the programming side that I want to get into next issue but for now, I head back to the office to get stuck into that box.
Powering up Net2 plus
My plan for Part One of our story is to get the Net2 plus controller onto my subnet, get the management software loaded and get a keypad wired into the system and enrolled. Once I’m across one device, adding additional readers and an intercom are going to be easier, I tell myself, feeling rather like the 7th Earl of Cardigan.
Dragging the box out of the cupboard where I’ve hidden it and taking out all the devices I’m again hit by the fact this Paxton solution is no half-measure when it comes to access control. All the gear is nicely done – the controllers, the intercom, the keypad, readers. Digging deeper into the box I find more controllers and a couple of lovely Paxlocks. Prying around in the Paxlock packaging I spy a set of batteries in the bottom. Whatever could those be for?
“When the devices are on a network and we scan that network, the devices will just pop up and you can see the MAC address, you select those devices you want to use and click Apply”
It goes without saying that the first device I’m going to connect to the system is Paxton’s ins-20104 external reader that I talked about a couple of issues ago. Even without the mounting plate this IP66-rated lump has serious hand feel and I think to myself that there has to be some way I can install it here at the SEN office. Why don’t we have access control, I wonder to myself. Sure, Lockwood 001s are great but they have no electricity running through them. Something must be done.
With these musings safely out of the way, I open the Net2 plus controller by loosening a single grub screw. Next, I put power to the integrated battery pack and with a beep and a flash, Net2 plus comes to life. Network connection is next, and I slot an RJ-45 from the controller to a spare unpowered port on my Netgear GS108P PoE switch.
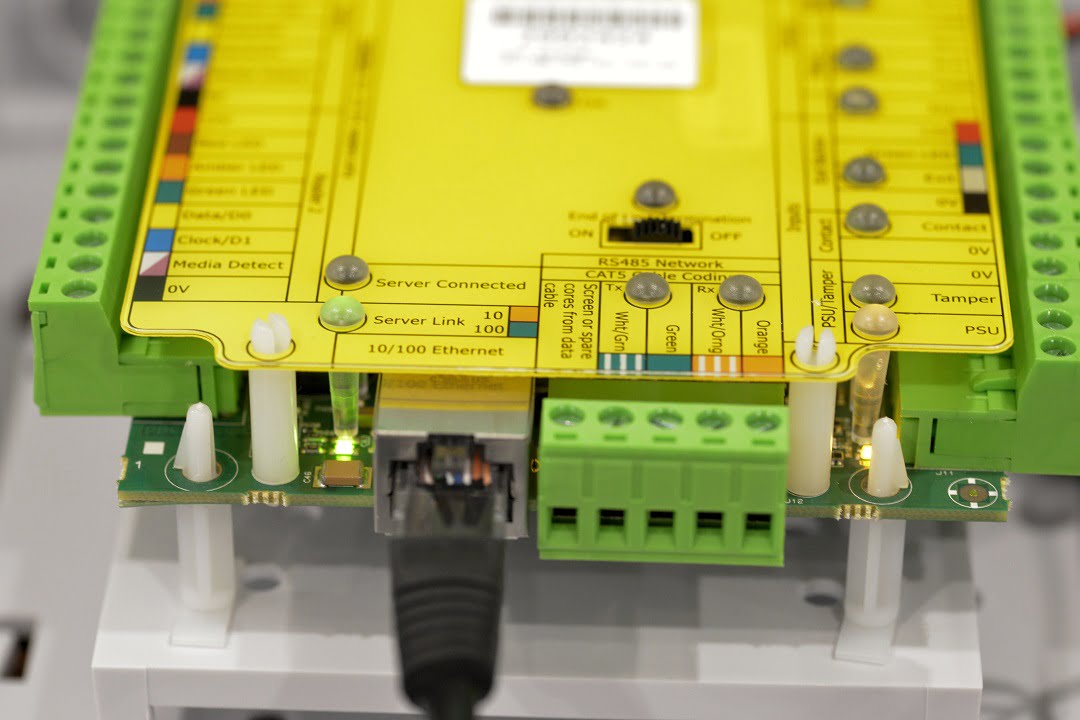
At this point I’ve got no software connection so I’m pleased to have a couple of LEDs to inform me there’s power and a Fast Ethernet server link. Peering at the layout of the controller I start to get more of a sense of what Krahner was talking about. Everything is labelled and all the termination blocks for readers, inputs and outputs are colour coded. It goes almost without saying, that I’m very pleased about this.
My next move is to hop onto Doctor Google and call up Net2 and download the Net2 Access Control software. This takes a wee while but once it’s complete, I unpack the download, which is managed by a typical wizard, requiring nothing more than the occasional wave along from me and a restart when everything is set up. With all this complete I get a Server Connected LED light on the controller. So far so good.
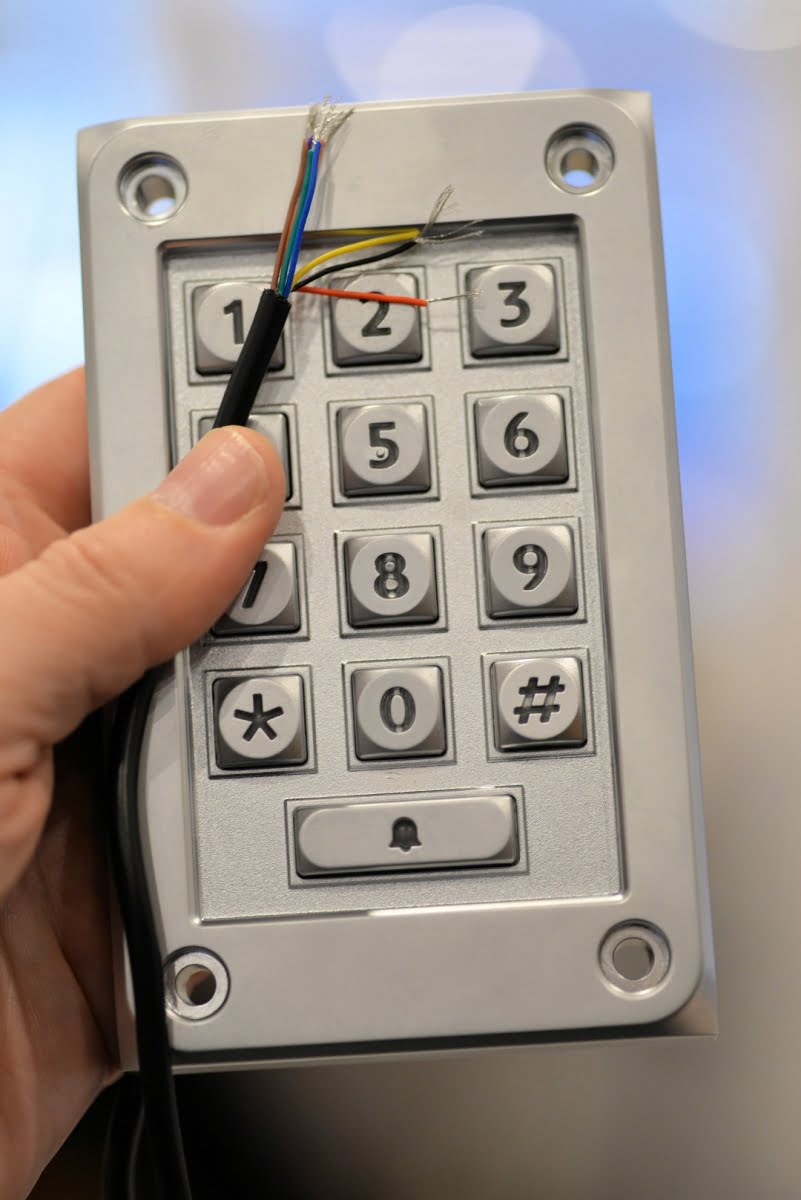
Now, with the keypad unpacked on my desk, I nip off the RJ-45 test plug fitted to the hardwired 5m flying lead. While I’m doing this I notice the alloy chassis, the 316 stainless fascia and the solid potting packed into the back of this keypad to ensure it remains impervious to the ingress of water. No doubt about it, for around 180 bucks this keypad is one tough monkey.
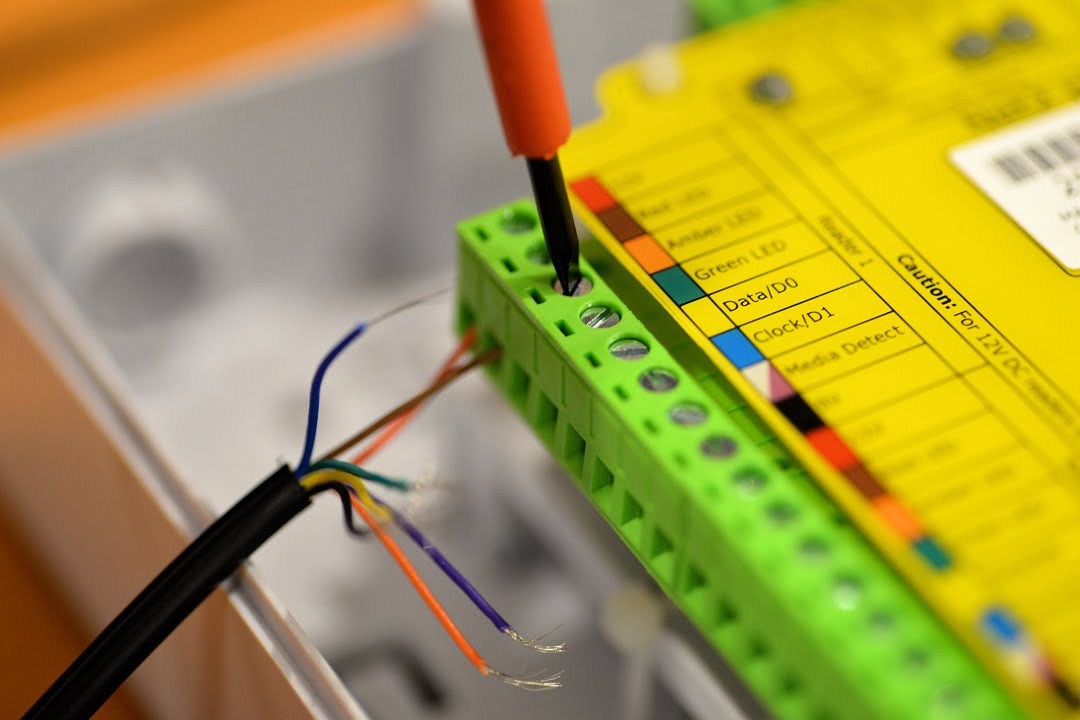
After stripping the outer cable sheath and the 8 internal wires, I back the screws out of the blocks a bit, then poke in the wires one at a time, tightening up the blocks as I go. As soon as the 0V negative termination goes in – Beep – the keypad comes alive, with a soft green glow from the lights integrated into its keys.
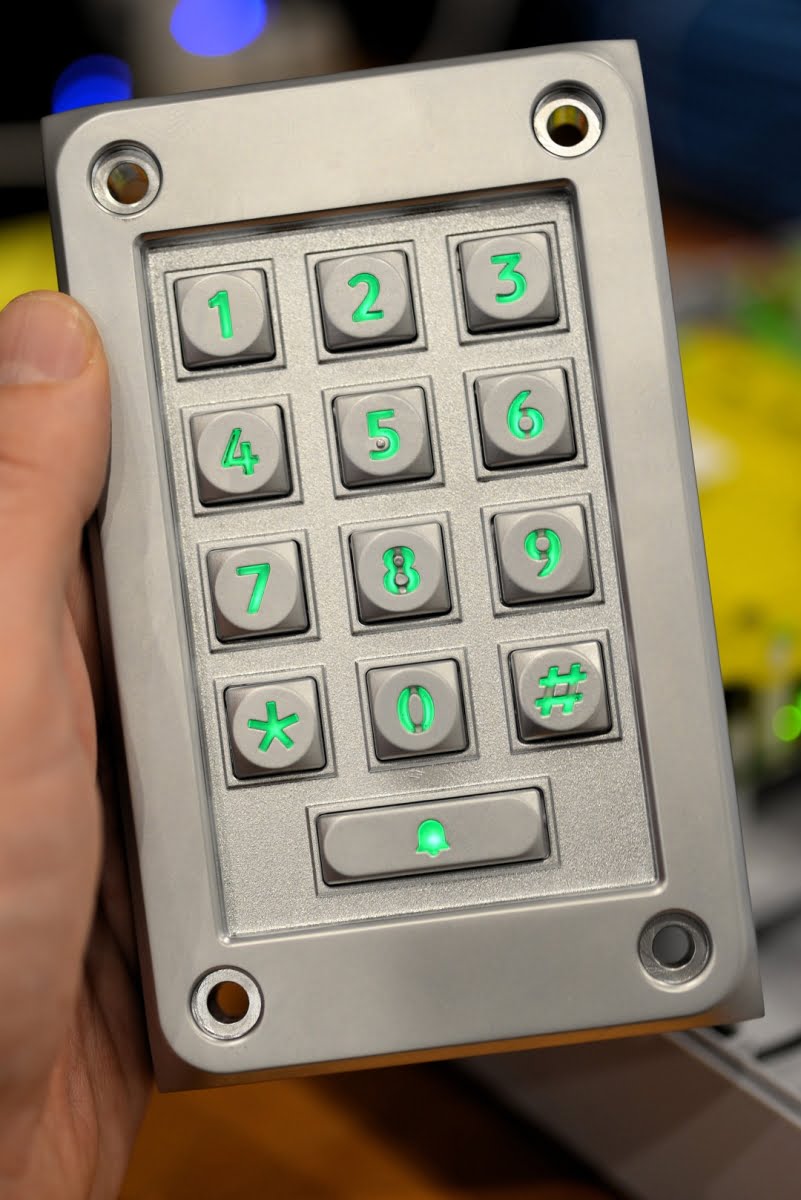
Before I started out, I spent a bit of time delving into Net2’s Application Notes, which are headed Installation, Configuration and Integration. These instruction sheets are right there in the management window only 2 clicks away from wherever you are in the software. Thanks to them, I know what to do next – I press a button on the keypad to register the device to the controller.
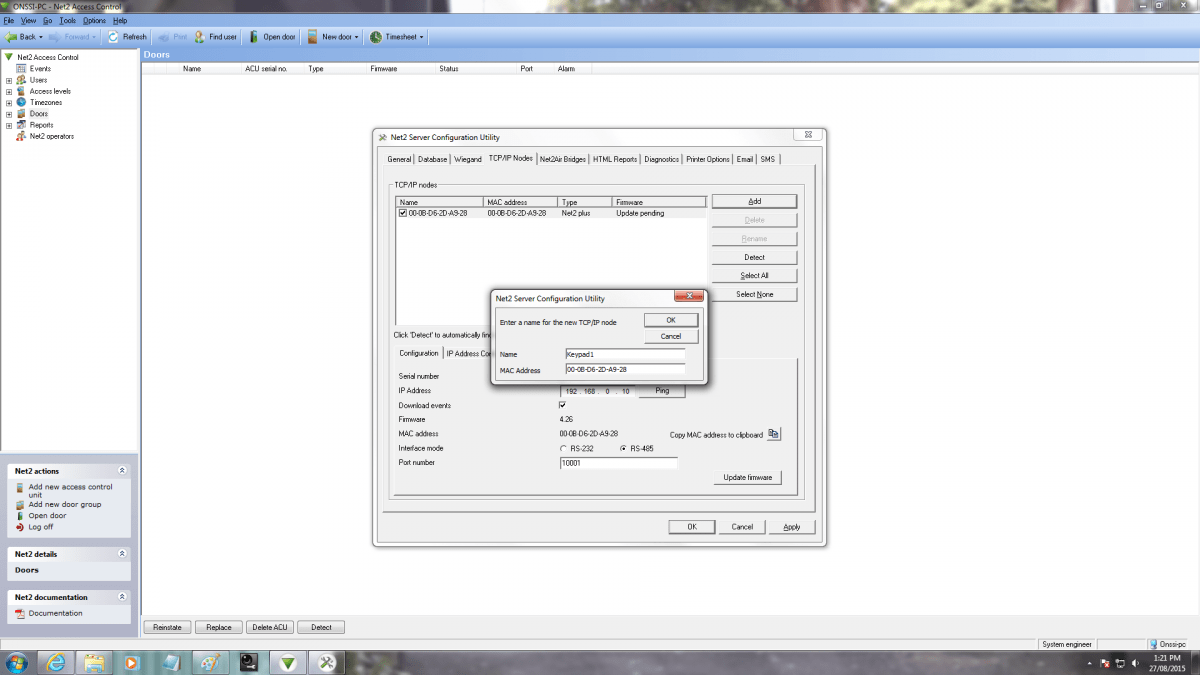
Finally, I hop into Net2’s Configuration Utility net2, step into TCP/IP node and hit the ‘Detect’ button. My heart rate is elevated at this point. My experience with finding CCTV cameras on my own subnet has been a bit of a farce lately but DHCP has taken care of things and up comes the reader with its IP address and MAC address for me to see. I name the reader, close the utility and bounce over into the Net2 Access Control software and click ‘Doors’. My reader appears with a red cross beside it, which after a few seconds turns into a green tick and the reader is enrolled and good to go.

So far the experience has been improbably simple – in fact it’s been exhilarating and I have a real sense of the momentum. Next issue, I’ll attach another reader to the controller, as well as some other devices and then go exploring the software. Just trolling through the dropdowns I can see there’s a lot of functionality going on here and it all seems extremely simple to access. Given the simplicity of the hardware to install, it’s the nature of the software that’s going to be the key. ♦
By John Adams
Features of Paxton Net2 plus include:
* RS485 Dataline and TCP/IP
* 2 voltage-free relays
* 2 reader ports & 1 intruder alarm port & relay
* 12V DC readers only
* 10/100 Ethernet port and RS485 data line connector
* Switchable termination resistors with LED
* Net2 plus and Net2 Classic work on same system.


