



Starlink Mini CCTV – Starlink Mini For Remote Site CCTV: What Installers Must Know
Starlink Mini For Remote Site CCTV: What Installers Must Know, And The Two Things Most Get Wrong.
Starlink Mini For Remote Site CCTV – The backpack-sized dish has made satellite backhaul cheap and quick enough to put cameras on sites that have no fixed line, but sizing it for video is not about the download speed on the box.
Construction sites, events, rural infrastructure, pop-up facilities and failover all need connectivity before a fixed line exists, and with the 3G network gone and mobile coverage patchy beyond the edges, more installers are reaching for Starlink. The Mini makes that practical. Here’s how to spec it for CCTV without getting caught out.
What The Mini Actually Is
Starlink Mini is a self-contained satellite terminal about the size of a laptop, with the Wi-Fi router built into the dish. It weighs roughly 1.1kg, carries an IP67 rating, runs from −30 to 50C and draws only about 25-40W from a 12-48V DC input – which is the part that matters on site, because it runs happily off a battery or a modest solar setup.
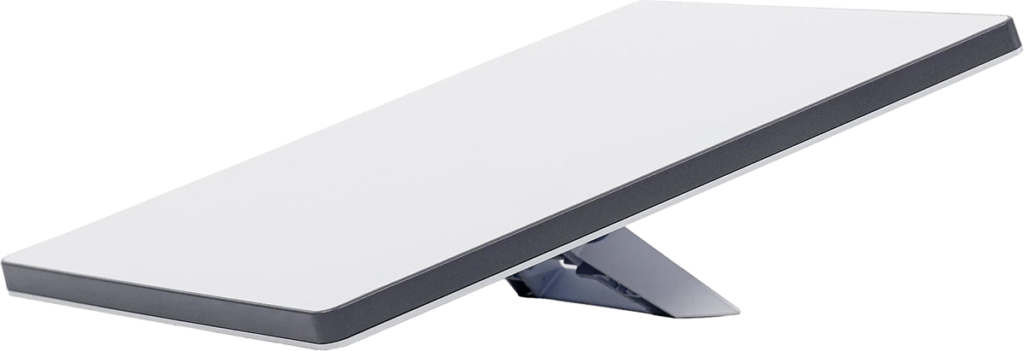
In Australia the hardware lists at around $599, though it is routinely discounted, and has sold for under $300 at major retailers. It runs on Starlink’s Roam plans: at the time of writing, Roam 100GB is $85 a month and Roam Unlimited is $210 a month, with a stationary Standby mode at $15 a month for sites that sit idle between jobs. Prices change often – confirm them at starlink.com/au before quoting.
Typical real-world performance is 50 to 150-plus Mbps down, 5 to 20 Mbps up, at 25 to 60ms latency. For a camera deployment, only two of those numbers really count.
Size It On Upload, Not Download
Here’s the first thing installers get wrong. A Starlink spec sheet leads with download speed, but CCTV sends video the other way – up to a cloud platform, an off-site recorder or a remote operator. What you can push off site is governed by the upload figure, and on the Mini that is the smaller, more variable number: often 5 to 20 Mbps, and deprioritised behind residential traffic at busy times.
So size the job on upload headroom. A single 1080p camera on efficient H.265 needs roughly 1.5 to 2.5 Mbps; a 4MP camera 2.2 to 4 Mbps; a 4K camera 5 to 10 Mbps. Add them up, leave generous headroom for busy scenes and for the moments upload drops, and you quickly see that a handful of continuously streaming cameras can fill the Mini’s uplink on their own.
The practical answer on almost every site is to record locally and send sparingly – which leads to the second trap.
The Data Cap Trap
Continuous cloud upload eats data at a rate that surprises people. One 1080p stream at 2 Mbps is around 20GB a day. Three of them will clear a 100GB Roam allowance in under two days. Size a continuous-cloud site on the Roam 100GB plan and it stops within the week.
There are two ways out. Put the cameras on a local NVR and upload only event clips, thumbnails and health data – which drops the monthly figure into the tens of gigabytes – or move to Roam Unlimited and accept that the traffic is deprioritised when the network is busy. For most remote sites, local recording plus event-based upload is both cheaper and more robust, because the footage survives a satellite dropout.
The CGNAT Gotcha
This is the one that generates the after-hours phone call. Starlink puts customers behind carrier-grade NAT (CGNAT), so a site has no public, static IP address. You cannot simply port-forward to an on-site NVR and view it from the office the way you might on a fixed line.
There are three clean ways around it. Use a cloud or VSaaS platform where the recorder makes an outbound connection to the cloud and you view through that. Use the camera or NVR vendor's own P2P/relay service, which does the same thing. Or stand up a VPN – many site routers and some NVRs support an outbound VPN tunnel back to a head-end. What you should not do is promise a client plain port-forwarded remote access over Starlink, because it will not work.
Power, Mounting And Weather
The Mini's low draw is a genuine advantage on a trailer, a pole or a solar-backed cabin, but plan the whole chain, not just the dish. The router, the switch, the cameras and any 4G failover all need to sit behind the same battery or solar budget, and the dish needs a clear view of the sky – a 110-degree cone – away from cranes, masts and foliage that move into the path as a site grows.
The terminal itself is rated IP67 and handles Australian weather well. The weak points are the same as any temporary install: the power source, cable entry, surge protection and physically securing a $600 dish that is easy to walk off with.
Where It Fits, And Where It Doesn't
Starlink Mini is a strong fit where a site is genuinely remote or temporary, where a fixed line would take weeks or cost thousands to run, and where the camera count is modest or the system records locally. Construction, agriculture, mining camps, events, disaster response and remote council assets all qualify.
It is a poor fit where symmetric, low-latency bandwidth is the requirement – a large permanent site pushing many high-resolution streams to the cloud in real time is better served by fibre or a fixed wireless link, and in town a 5G router will often beat it on both latency and monthly cost. As with any single link, mission-critical sites should run a second path and fail over automatically.
The Verdict
Starlink Mini has quietly solved a problem that used to kill remote camera jobs before they started: getting a usable connection to a site with no line and no mobile signal. It is light, sips power and deploys in minutes.
That said, it is not a fixed line. Spec it on upload, keep the recording local and the cloud traffic light, plan for CGNAT from the start, and it earns its place in the kit. Treat it like symmetric fibre and it will disappoint. Used within its limits, it opens up sites that were simply off the map before.
You can learn more about Starlink here, read more of our Tech Talk here, or read more SEN news here.
“Treat it like symmetric fibre and it will disappoint.”
What upload speed does Starlink Mini give for CCTV?
How much data does a CCTV camera use on Starlink?
Can I port-forward to an NVR over Starlink?
How much power does Starlink Mini draw?
Which Starlink plan suits a remote CCTV site?
Is Starlink Mini better than 5G for site CCTV?
Can Starlink give the Mini a static public IP?
How big a battery or solar setup does a Starlink CCTV trailer need?
FEATURES: Starlink Mini On Site – Quick Reference
- About 1.1kg, IP67, −30 to 50C, 25-40W from 12-48VDC
- Typical 50-150+ Mbps down, 5-20 Mbps up, 25-60ms latency
- Runs on Roam plans; confirm current AU pricing before quoting
- Size the job on upload headroom, not download
- Record locally, upload events – not continuous cloud on a capped plan
- Plan for CGNAT: cloud VMS, vendor P2P or a VPN, never plain port-forwarding
- Add automatic failover for anything mission-critical.